Rowing exercises are a great way to target your back muscles and improve your overall fitness. One popular way to perform this exercise is on the Smith machine. While the Smith machine is often associated with squats and bench presses, it can also be used for other exercises such as rows.
What is a Smith Machine?

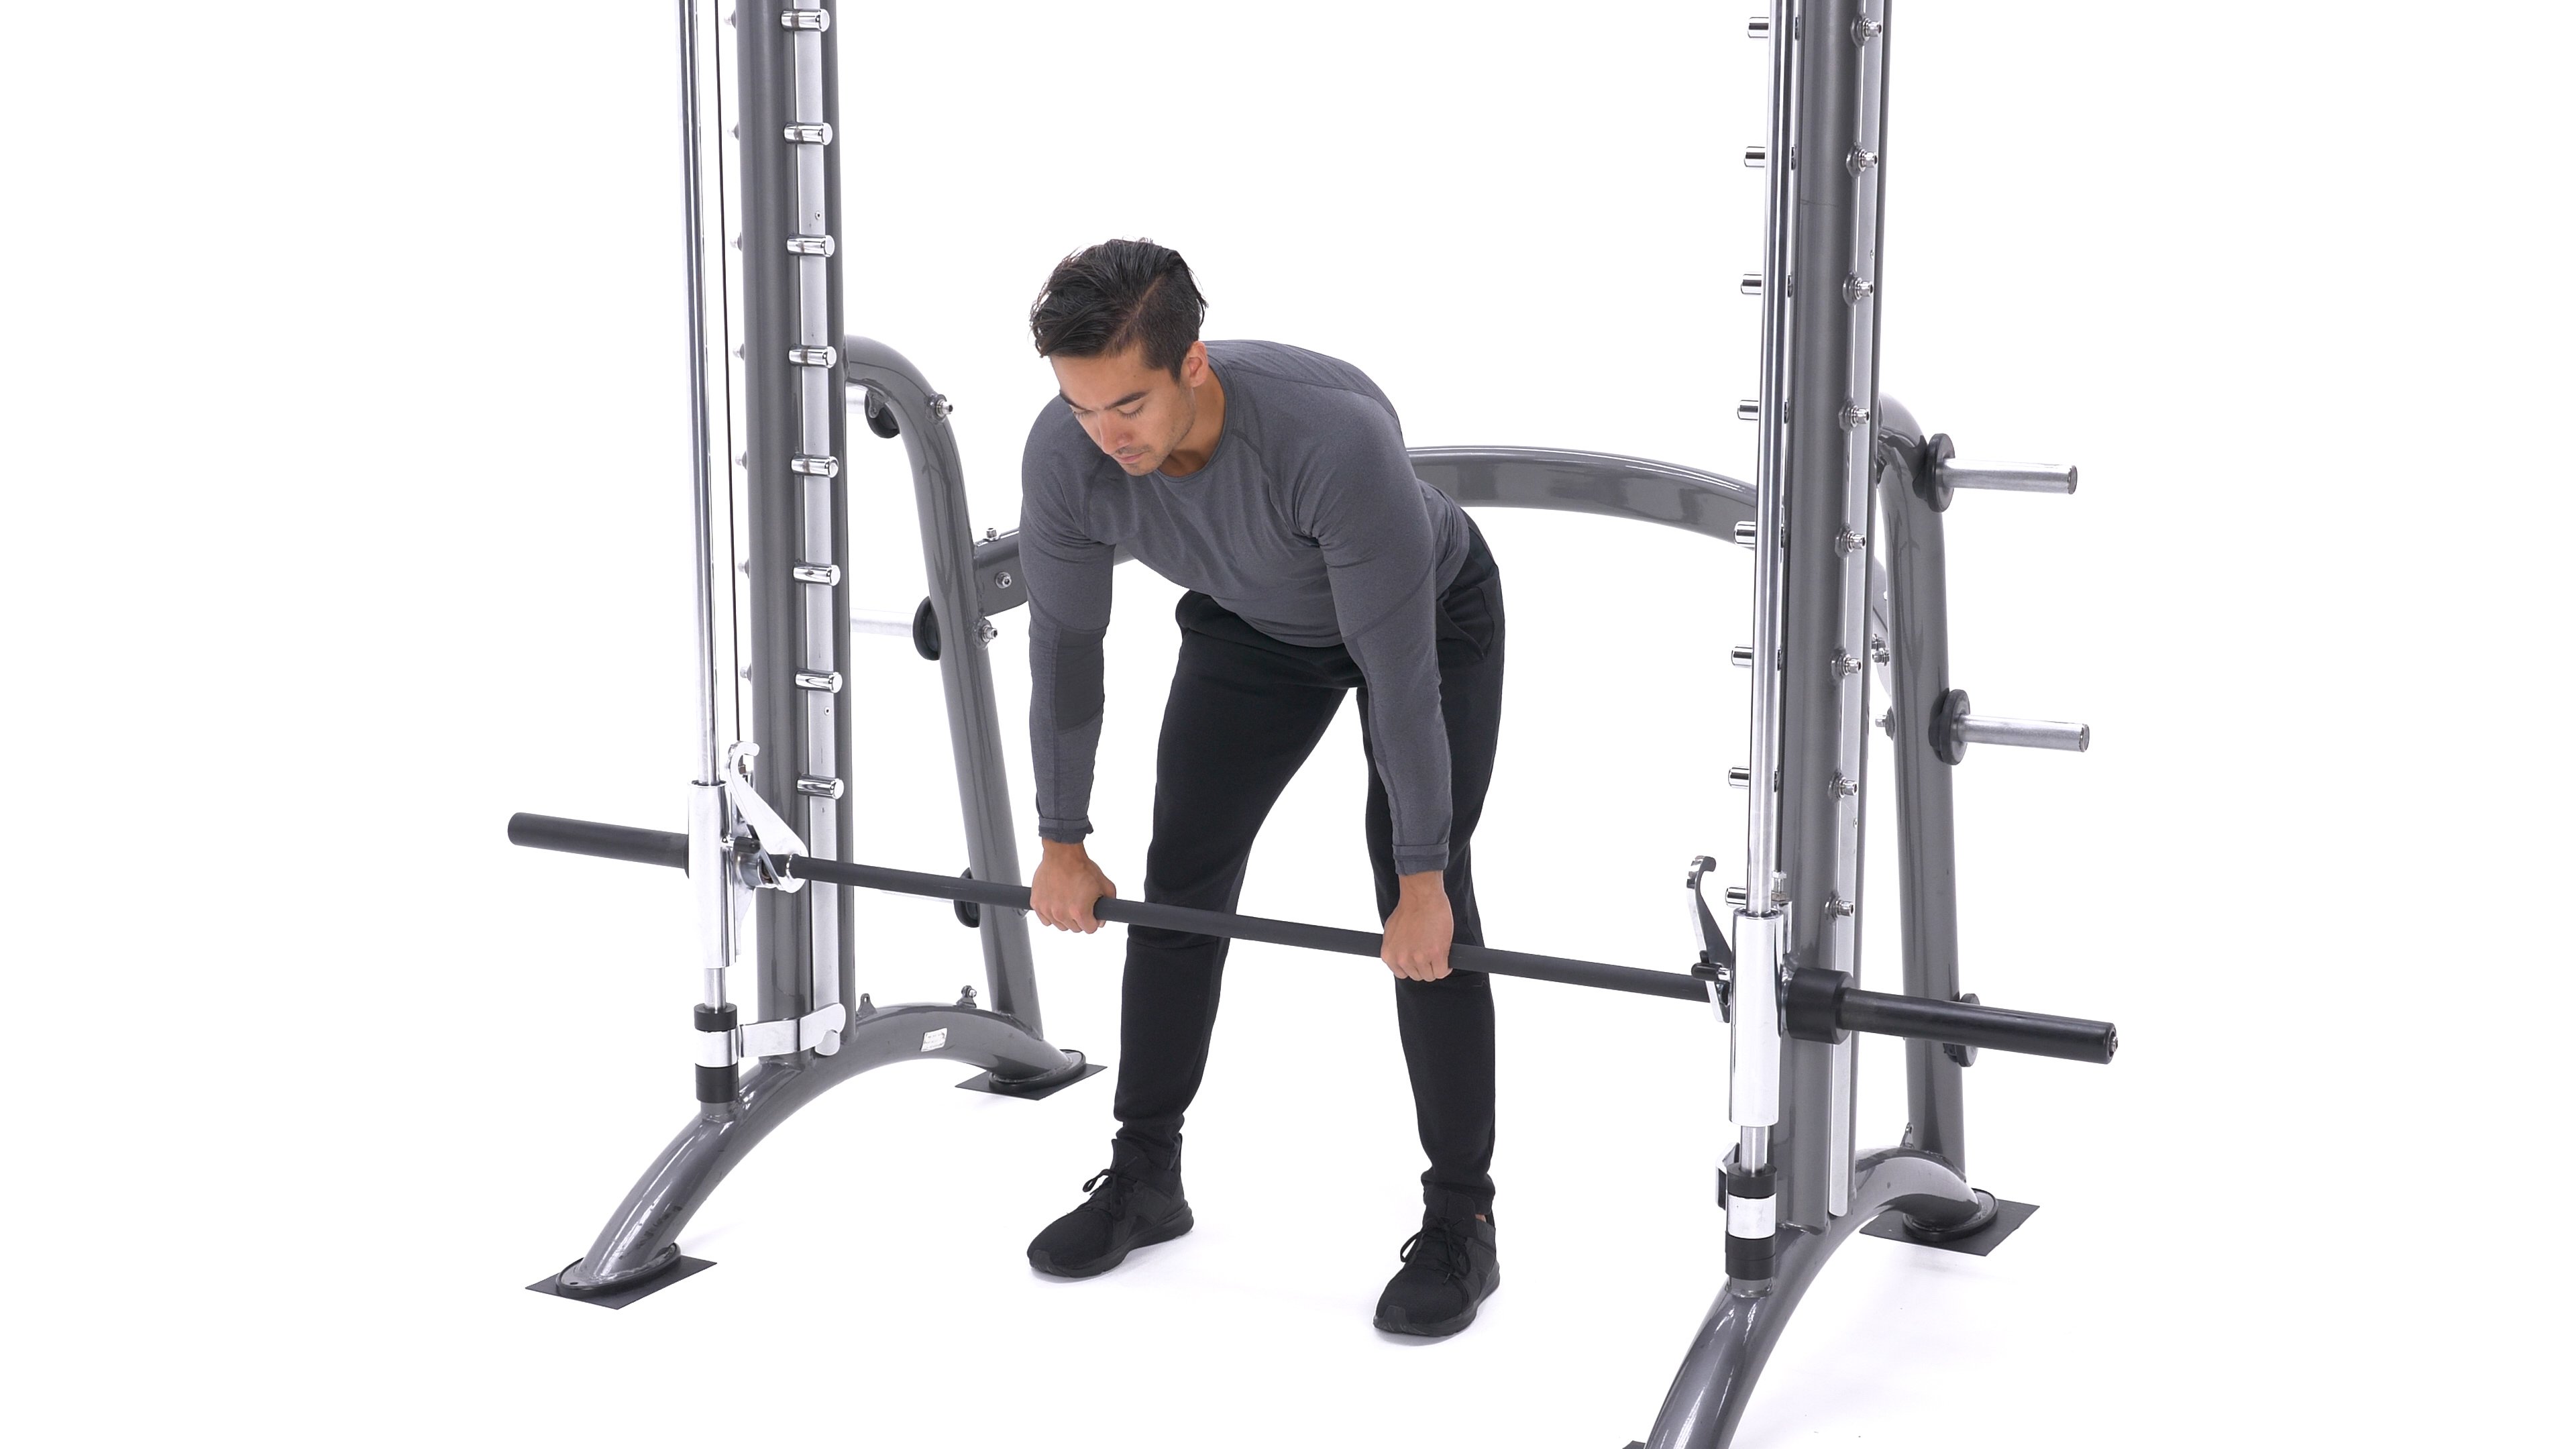
A Smith machine is a piece of weight training equipment that consists of a barbell that is fixed within steel rails. This allows the bar to move only in a vertical plane, which can help stabilize the movement and make it easier to perform certain exercises with proper form.
Why Row on a Smith Machine?
Rowing on a Smith machine can be beneficial for several reasons. First, the fixed barbell can help you maintain proper form throughout the movement. Additionally, the machine allows you to easily adjust the height of the bar, which can make it easier to target different areas of your back.
How to Perform a Row on a Smith Machine
To perform a row on a Smith machine, follow these steps:
- Set the bar to an appropriate height. When standing in front of the machine, the bar should be at about waist height.
- Stand with your feet shoulder-width apart and grasp the bar with an overhand grip.
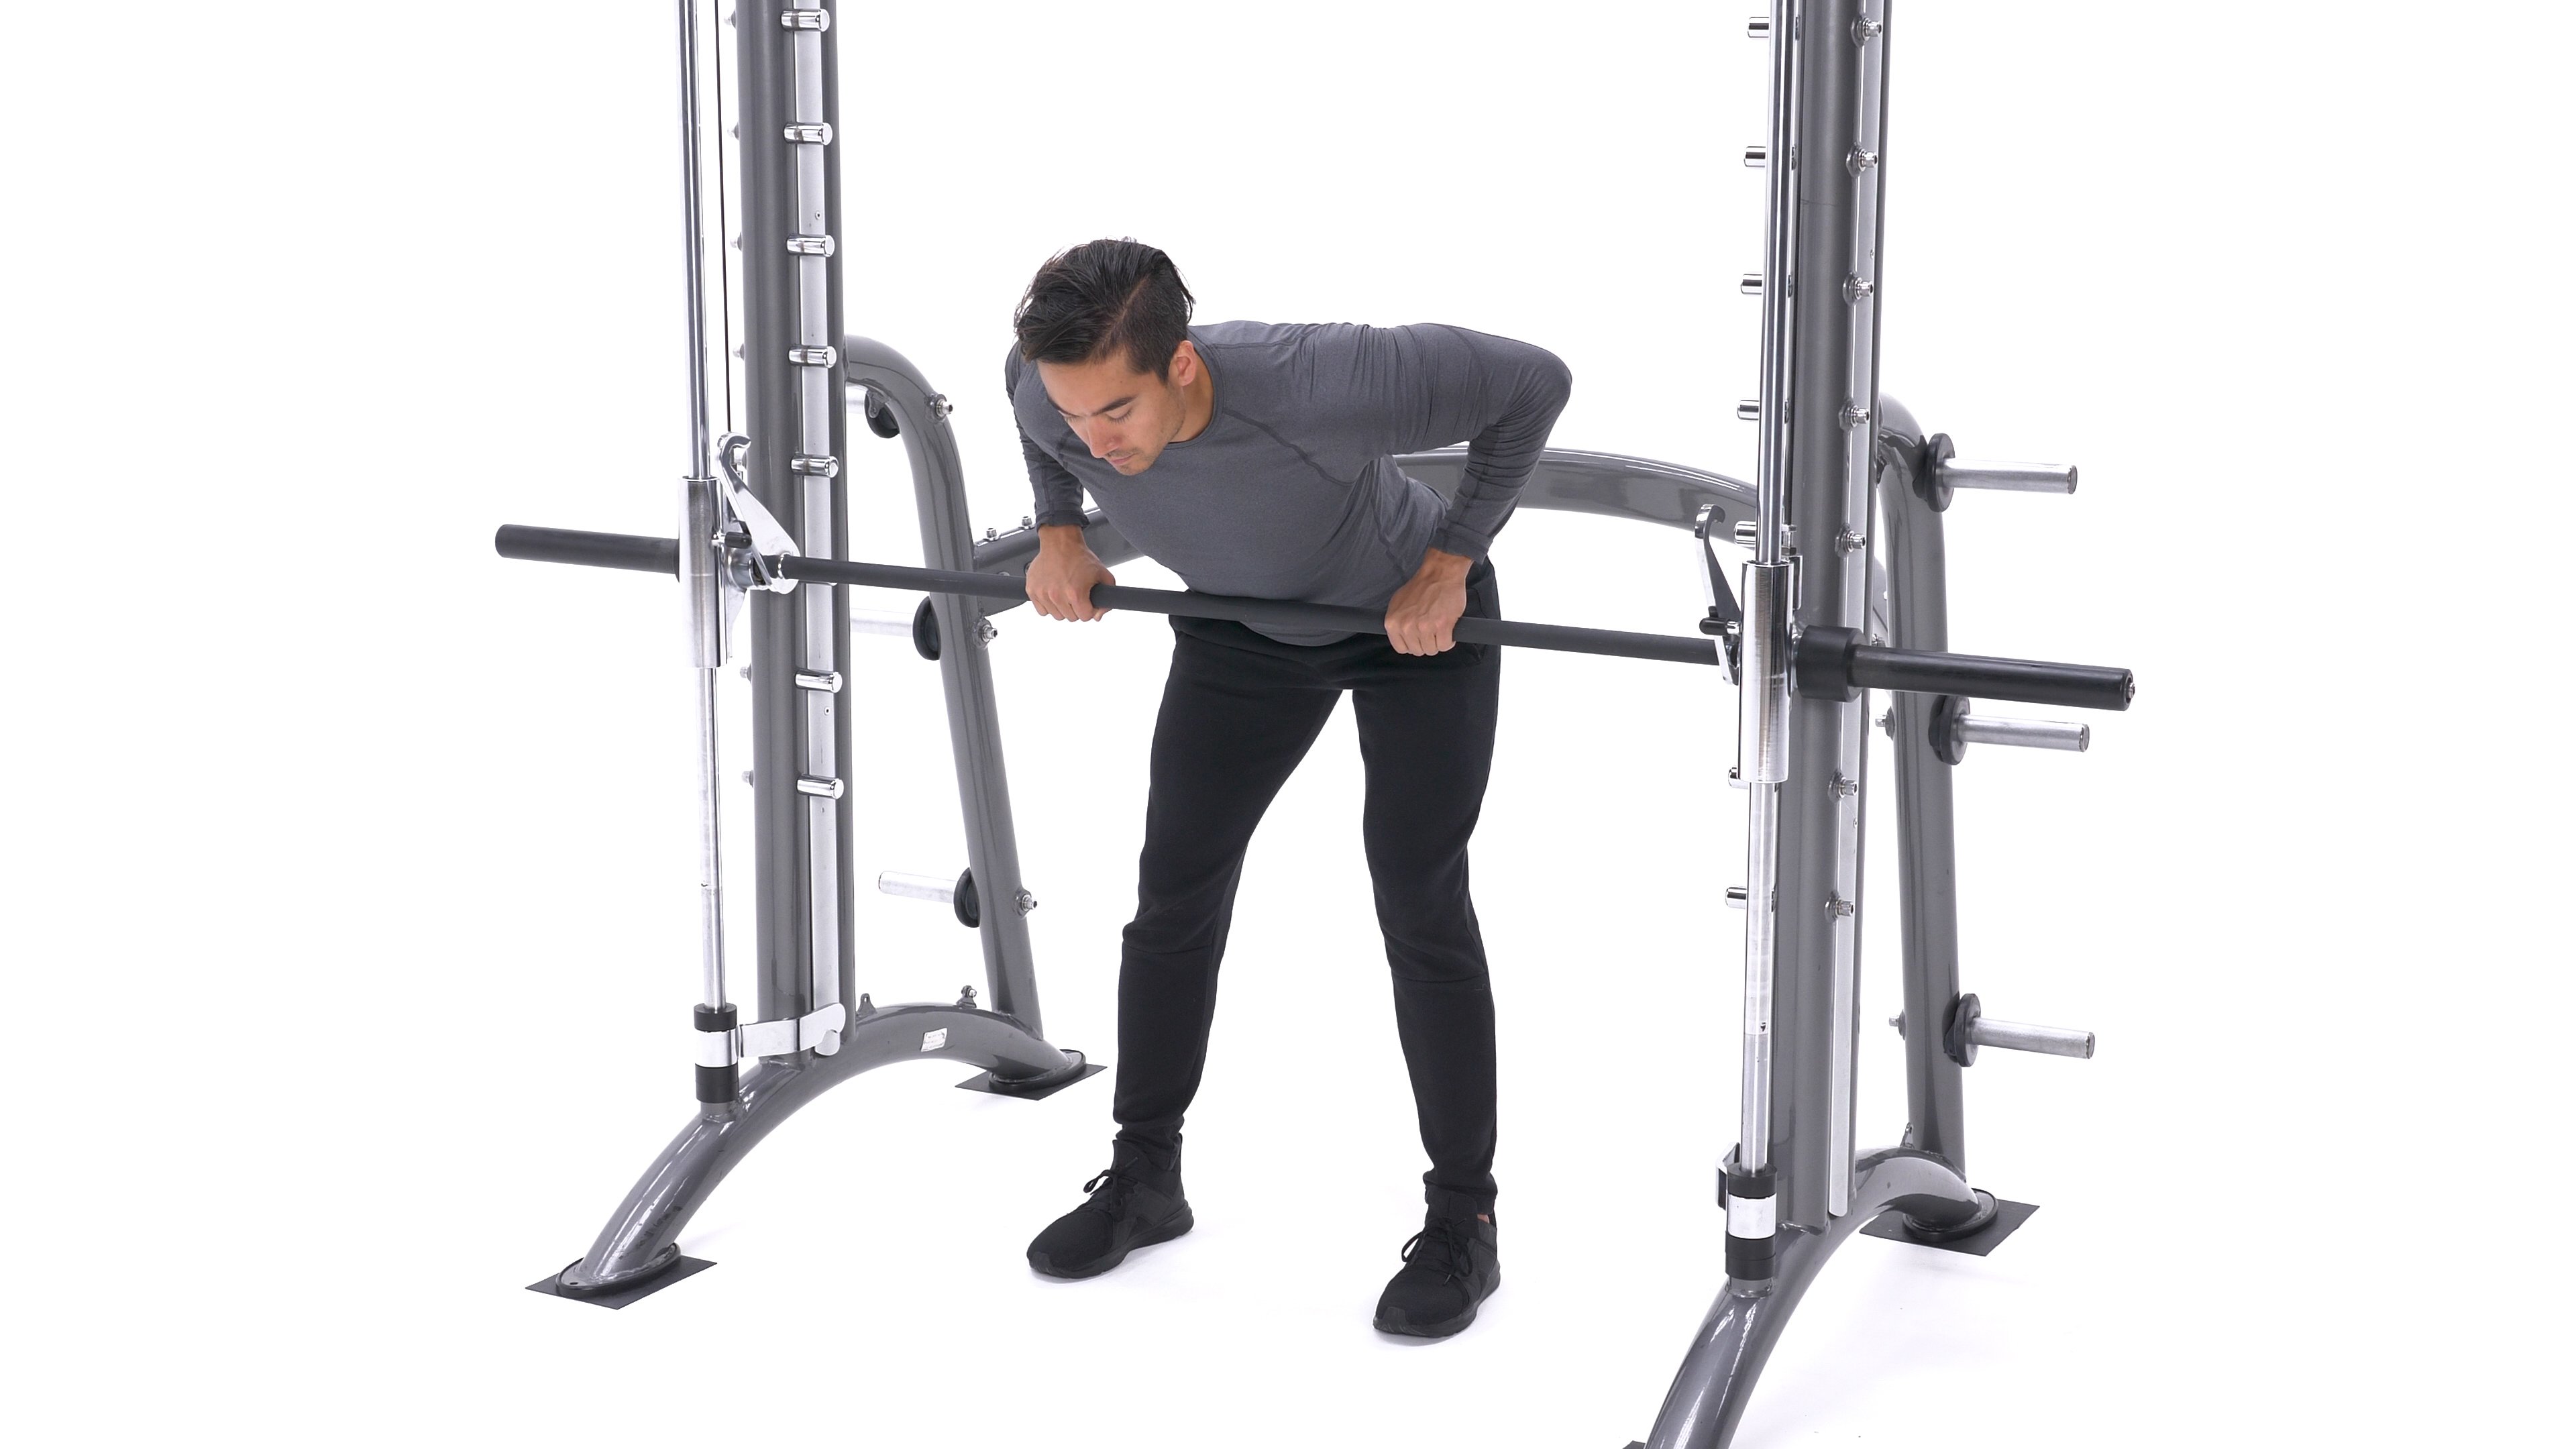
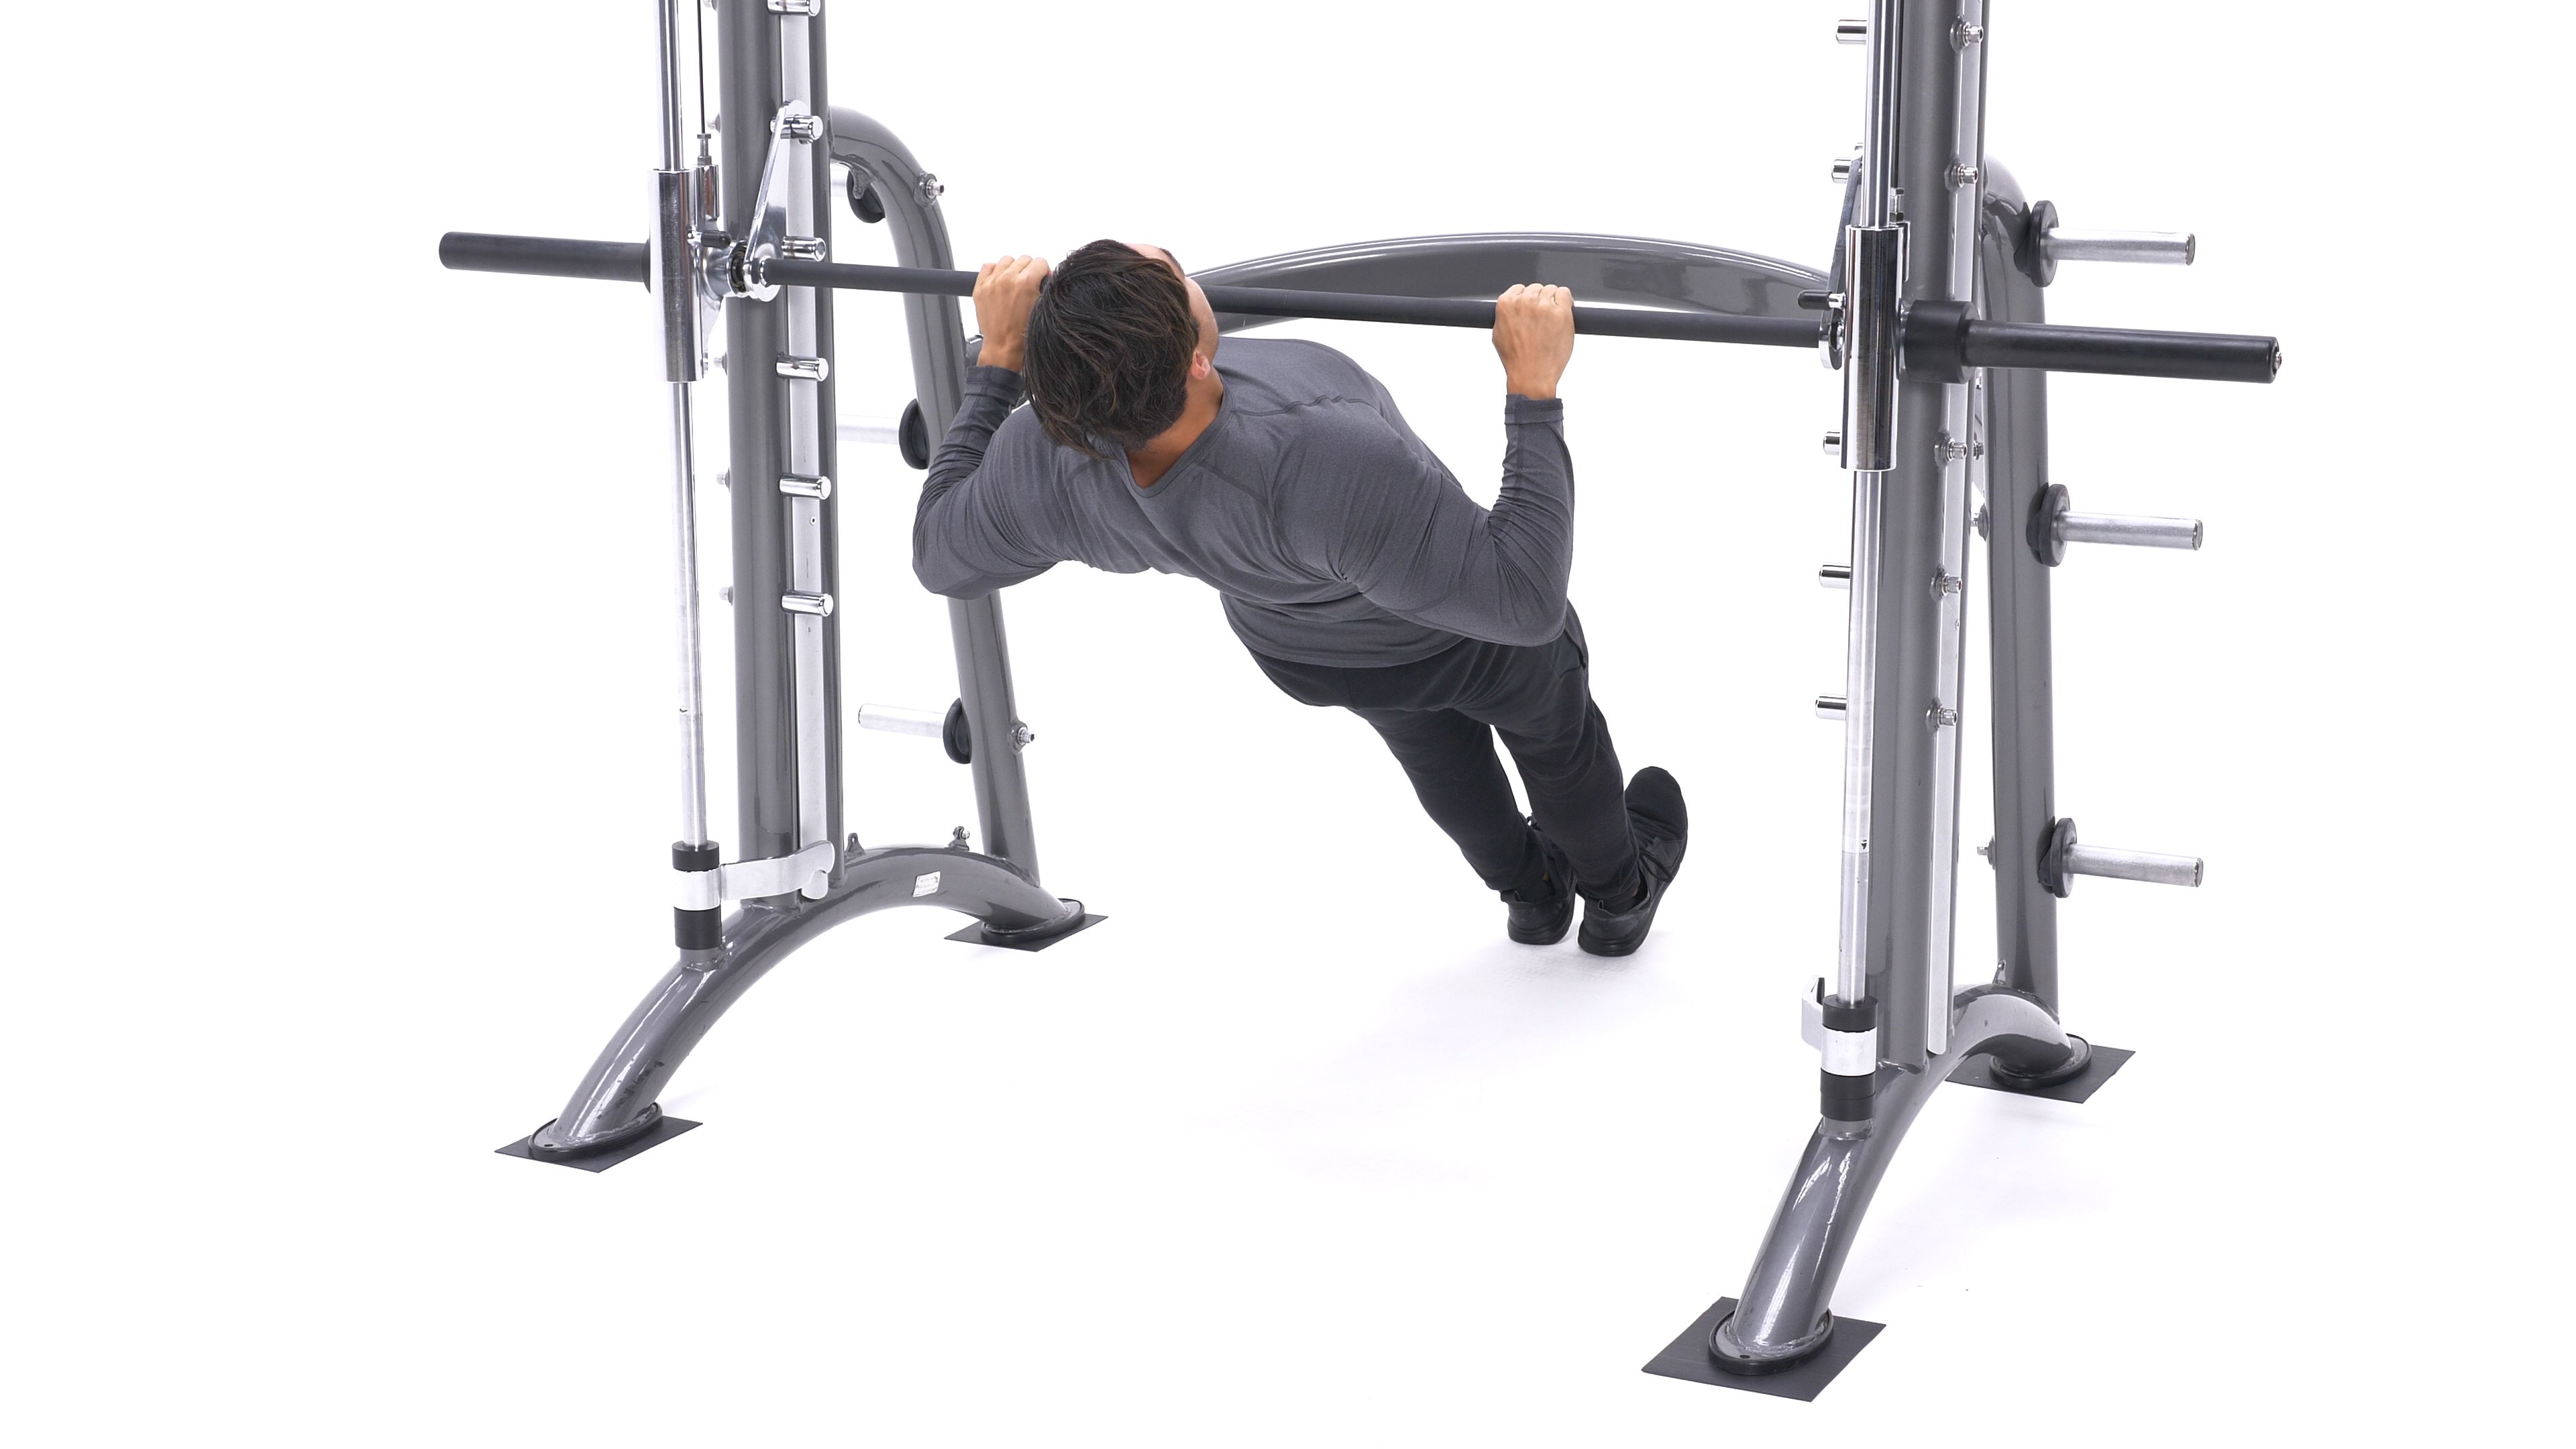
- Keeping your core tight and your back straight, pull the bar towards your chest, squeezing your shoulder blades together as you do so.
- Lower the bar back down to the starting position and repeat for the desired number of reps.
Tips for Proper Form and Technique

Proper form is key when performing a row on a Smith machine. Here are some tips to help you get the most out of this exercise:
- Keep your back straight and your core tight throughout the movement. Avoid rounding your spine or arching your back.
- Squeeze your shoulder blades together at the top of the movement to really target your back muscles.
- Use an appropriate weight that allows you to perform the exercise with proper form. Avoid using too heavy of a weight that causes you to sacrifice form.
- Perform the exercise in a controlled manner, avoiding jerky or swinging movements.
Variations of Rowing on a Smith Machine

There are several variations of rowing exercises that can be performed on a Smith machine. Here are a few to consider:
- Underhand grip rows: Instead of using an overhand grip, grasp the bar with an underhand grip. This can help target different areas of your back.
- Single-arm rows: Perform the exercise with one arm at a time. This can help improve your balance and stability.
- Wide-grip rows: Place your hands wider apart on the bar to target different areas of your back.
Conclusion
Rowing on a Smith machine can be a great way to target your back muscles and improve your overall fitness. By following proper form and technique, you can get the most out of this exercise and avoid injury. Consider incorporating this exercise into your next workout routine and see how it can benefit you.
Related video of Row On Smith Machine: A Guide to Proper Form and Technique

Heel elevated squats are a variation of the traditional squat exercise that involves standing on an elevated surface with your heels. This exercise is a great way to target your glutes, quads, and hamstrings, as well as improve your overall lower body strength. In this article, we'll explore what heel elevated squats do and how to perform them correctly.
What Are Heel Elevated Squats?
Heel elevated squats, also known as hack squats, are a variation of the traditional squat exercise. Instead of standing on a flat surface, you stand on an elevated surface with your heels. This slight change in the exercise targets your glutes, quads, and hamstrings more effectively.

When you perform heel elevated squats, your heels are raised by a few inches, which shifts your weight onto your toes. This forces your quads and glutes to work harder to maintain your balance and control the movement. Additionally, the elevated surface increases the range of motion of the exercise, which means you can target your muscles more effectively.
Benefits of Heel Elevated Squats
Heel elevated squats offer several benefits, including:
- Improved lower body strength: Heel elevated squats target your glutes, quads, and hamstrings more effectively than traditional squats, which means you can improve your lower body strength more quickly.
- Increased range of motion: The elevated surface allows you to squat deeper, which means you can target your muscles more effectively.
- Better balance and stability: The shift in weight onto your toes forces your body to work harder to maintain balance and control, which can improve your overall balance and stability.
- Variation in your workout: If you've been doing traditional squats for a while, adding heel elevated squats to your routine can provide a new challenge and help you break through a plateau.
How to Perform Heel Elevated Squats

To perform heel elevated squats, follow these steps:
- Find an elevated surface, such as a weight plate or aerobic step, and place it on the ground.
- Stand with your feet shoulder-width apart on the elevated surface, with your heels hanging off the edge.
- Engage your core and keep your chest up as you lower into a squat, keeping your weight on your toes.
- Lower down until your thighs are parallel to the ground or lower.
- Push back up through your heels to return to standing position.
- Repeat for 10-12 reps for 3-4 sets.
Tips for Performing Heel Elevated Squats
To perform heel elevated squats safely and effectively, keep these tips in mind:
- Start with a lower weight or no weight until you feel comfortable with the movement.
- Engage your core and keep your chest up throughout the exercise to maintain proper form.
- Keep your weight on your toes throughout the exercise.
- Lower down until your thighs are parallel to the ground or lower.
- Push back up through your heels to return to standing position.
- Don't let your knees collapse inward or go past your toes.
Conclusion
Heel elevated squats are a great way to target your glutes, quads, and hamstrings more effectively than traditional squats. By raising your heels a few inches, you increase the range of motion of the exercise and shift your weight onto your toes, forcing your body to work harder to maintain balance and control. Adding heel elevated squats to your workout routine can provide a new challenge and help you break through a plateau.
Related video of What Does Heel Elevated Squats Do
The dumbbell lat pull down is a popular exercise that targets the latissimus dorsi muscle, commonly referred to as the "lats." This muscle is the largest and most prominent muscle in the back and plays a crucial role in maintaining good posture and overall back strength. In this article, we'll provide a comprehensive guide on how to perform the dumbbell lat pull down, its benefits, and some tips to ensure proper form and technique.
The Benefits of Dumbbell Lat Pull Down
The dumbbell lat pull down is an excellent exercise for building a strong, muscular back. Here are some of the benefits:
- Targets the latissimus dorsi muscle, which is essential for good posture and overall back strength
- Isolation of the lats helps to develop a V-shaped back
- Improves grip strength and forearm development
- Helps to prevent injuries in the upper back and shoulders

How to Perform the Dumbbell Lat Pull Down
Here's a step-by-step guide on how to perform the dumbbell lat pull down:
- Start by sitting on a bench with your feet flat on the ground and your back straight.
- Hold a dumbbell in each hand with your palms facing towards your body.
- Extend your arms above your head, keeping a slight bend in your elbows.
- Engage your core muscles and slowly pull the dumbbells down towards your chest, focusing on squeezing your shoulder blades together.
- Pause for a second at the bottom of the movement, then slowly raise the dumbbells back to the starting position.
- Repeat for the desired number of repetitions.
It's important to keep your movements slow and controlled throughout the exercise. Avoid using momentum to swing the weights up and down, as this can cause injury and reduce the effectiveness of the exercise.

Tips for Proper Form and Technique
Here are some tips to ensure proper form and technique when performing the dumbbell lat pull down:
- Keep your chest up and your shoulders back throughout the exercise.
- Engage your core muscles to maintain stability and prevent excessive arching of the lower back.
- Focus on squeezing your shoulder blades together at the bottom of the movement.
- Avoid shrugging your shoulders up towards your ears.
- Remember to breathe in on the way down and out on the way up.
Variations of Dumbbell Lat Pull Down
There are several variations of the dumbbell lat pull down that you can try to target different areas of your back:
- Reverse grip dumbbell lat pull down - this targets the lower lats and biceps.
- Single-arm dumbbell lat pull down - this increases the difficulty and helps to improve unilateral strength.
- Wide-grip dumbbell lat pull down - this targets the outer lats and helps to widen the back.

Conclusion
The dumbbell lat pull down is an excellent exercise for building a strong, muscular back. By following the proper form and technique, you can maximize the benefits of this exercise and prevent injury. Remember to start with a light weight and gradually increase the weight as you become stronger. Incorporate the dumbbell lat pull down into your regular workout routine to see significant improvements in your back strength and overall physique.
Related video of Dumbbell Lat Pull Down: A Comprehensive Guide
Deadlifts are one of the most effective exercises for building strength, but if you're not doing them correctly, you could be putting yourself at risk for injury. The straight leg deadlift, in particular, requires proper form to ensure that you're targeting the right muscles and avoiding injury. In this article, we'll cover everything you need to know about straight leg deadlift form.
What is a Straight Leg Deadlift?

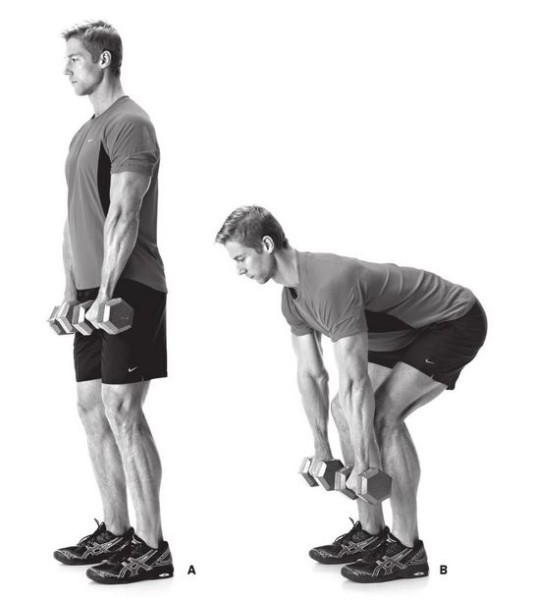
A straight leg deadlift, also known as a Romanian deadlift, is a type of deadlift that primarily targets the hamstrings and glutes. Unlike a traditional deadlift, which involves bending your knees and lowering your hips, the straight leg deadlift involves keeping your legs straight and lowering the weight by hinging at your hips.
The Benefits of Straight Leg Deadlifts

Straight leg deadlifts are a great exercise for building strength and muscle in the hamstrings and glutes. They also engage the lower back and core muscles, making them a great full-body exercise. Additionally, because they require minimal equipment, they can be done almost anywhere.
Proper Form for Straight Leg Deadlifts
Proper form is essential for getting the most out of your straight leg deadlifts while minimizing the risk of injury. Here's a step-by-step guide on how to perform a straight leg deadlift:
- Start by standing with your feet hip-width apart, holding a barbell or dumbbells in front of your thighs.
- Tighten your core and glutes, and keep your shoulders back and down.
- Slowly hinge at your hips, keeping your legs straight and your back flat. Lower the weight towards the floor, making sure to keep it close to your body.
- Once you feel a stretch in your hamstrings, pause and then slowly lift the weight back up by squeezing your glutes and driving your hips forward.
- Repeat for the desired number of reps.
Common Mistakes to Avoid

Here are some common mistakes to avoid when performing straight leg deadlifts:
- Bending your knees: Keep your legs straight throughout the movement to properly engage your hamstrings and glutes.
- Rounding your back: Keep your back flat and your shoulders back and down to avoid putting unnecessary stress on your lower back.
- Using too much weight: Start with a lighter weight and gradually increase as you get more comfortable with the movement.
Variations of the Straight Leg Deadlift

There are several variations of the straight leg deadlift that you can try to switch up your routine and target different muscles:
- Single-leg straight leg deadlifts
- Sumo deadlifts
- Stiff-legged deadlifts
Conclusion
The straight leg deadlift is a great exercise for building strength and muscle in the hamstrings and glutes. By following proper form and avoiding common mistakes, you can get the most out of this exercise while minimizing your risk of injury.
Related video of Straight Leg Deadlift Form: A Comprehensive Guide
Kettlebell exercises are a great way to build strength and muscle in the body. One of the best exercises for building strength in the upper back and shoulders is the kettlebell row. This exercise targets the muscles in the back, shoulders, and arms, making it an effective way to build overall upper body strength.

Muscles Worked in the Kettlebell Row Exercise
The kettlebell row is a compound exercise that targets multiple muscles in the upper body. The primary muscles worked in this exercise include:
- Rhomboids
- Trapezius
- Deltoids
- Biceps
- Forearms
Rhomboids: The rhomboids are located in the upper back and are responsible for retracting the shoulder blades. They play a crucial role in maintaining good posture and are heavily targeted in the kettlebell row exercise.

Trapezius: The trapezius muscle is a large muscle that spans the upper back and shoulders. It is responsible for stabilizing the shoulder blades and is heavily targeted in the kettlebell row exercise.

Deltoids: The deltoid muscles are located in the shoulders and play a crucial role in overhead movements. They are heavily targeted in the kettlebell row exercise.

Biceps: The biceps are located in the front of the upper arm and are responsible for elbow flexion. They are heavily targeted in the kettlebell row exercise.
Forearms: The forearms play a crucial role in grip strength and are heavily targeted in the kettlebell row exercise.
How to Perform the Kettlebell Row Exercise
The kettlebell row is a simple exercise that can be performed by anyone with a kettlebell and a flat surface. Follow these steps to perform the kettlebell row exercise:
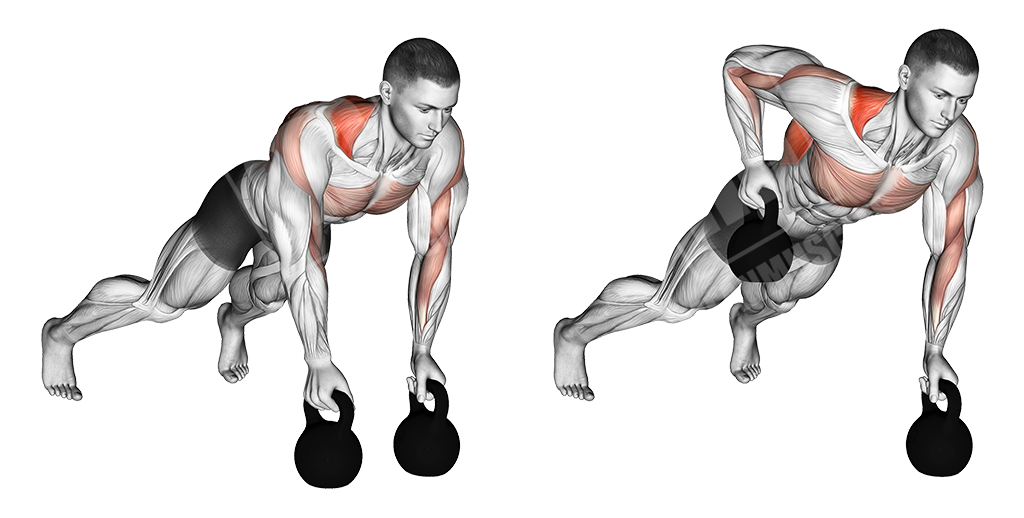
- Stand with your feet shoulder-width apart and hold a kettlebell in your right hand.
- Bend forward at the waist and place your left hand on a bench or other stable surface.
- With your right arm fully extended, pull the kettlebell up towards your chest, keeping your elbow close to your body.
- Lower the kettlebell back down to the starting position and repeat for the desired number of reps.
- Switch arms and repeat the exercise on the left side.
It's important to maintain good posture throughout the exercise and to keep your shoulders and hips level. It's also important to use a weight that is challenging but manageable, and to increase the weight gradually as you become stronger.
Variations of the Kettlebell Row Exercise
There are several variations of the kettlebell row exercise that can be used to target different muscles in the upper body. Some of the most popular variations include:
- Single-arm kettlebell row
- Renegade row
- Kettlebell high row
- Kettlebell low row
Each of these variations targets slightly different muscles in the upper body and can be used to add variety to your workout routine.
Conclusion
The kettlebell row is an effective exercise for building strength and muscle in the upper back, shoulders, and arms. By targeting multiple muscles at once, this exercise is a great way to get a full-body workout in a short amount of time. Whether you're a beginner or an experienced lifter, the kettlebell row is a great exercise to add to your workout routine.
Related video of Kettlebell Row Muscles Worked

Db rolling triceps extensions, also known as dumbbell rolling triceps extensions or skull crushers, are a popular exercise among fitness enthusiasts. This exercise targets the triceps muscles that are located at the back of the upper arm.
How to Perform Db Rolling Triceps Extensions
To perform db rolling triceps extensions, you need a pair of dumbbells and a flat bench or exercise ball. Here are the steps:
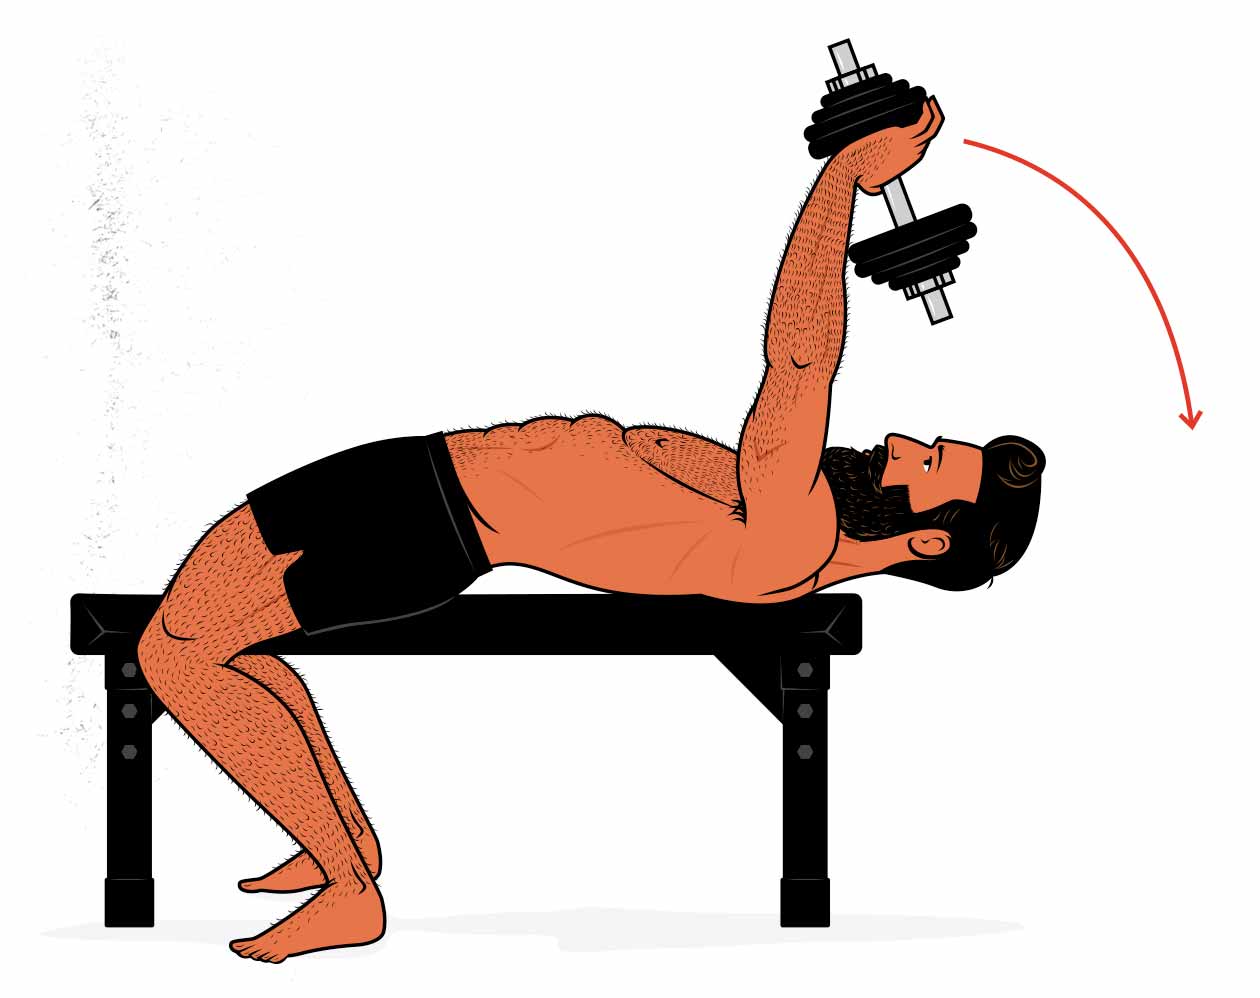
- Lie down on the bench or exercise ball with your feet on the ground and your back straight.
- Hold the dumbbells with an overhand grip and extend your arms straight up toward the ceiling.
- Lower the dumbbells down toward your head, bending your elbows and keeping your upper arms stationary.
- As you lower the dumbbells, roll them toward your shoulders by rotating your wrists.
- Bring the dumbbells back up to the starting position by extending your arms straight up and rolling them back to the starting position.

Tips for Proper Form
To prevent injury and get the most out of this exercise, here are some tips for proper form:
- Keep your elbows close to your head throughout the exercise.
- Do not arch your back or lift your hips off the bench or ball.
- Use a weight that is challenging but allows you to maintain proper form.
- Exhale as you extend your arms up and inhale as you lower the dumbbells down.
The Benefits of Db Rolling Triceps Extensions
Db rolling triceps extensions offer several benefits, including:
- Targeting the triceps muscles for increased strength and definition.
- Improving overall arm and shoulder strength.
- Strengthening the stabilizing muscles in the shoulders and chest.
- Providing a challenging exercise that can be easily modified for different fitness levels.

Variations of Db Rolling Triceps Extensions
If you want to switch up your triceps workout, here are some variations of db rolling triceps extensions:
- Close-grip bench press
- Triceps pushdowns
- Overhead triceps extensions
- Triceps dips
Conclusion
If you want to strengthen and define your triceps muscles, db rolling triceps extensions are a great exercise to incorporate into your workout routine. By following proper form and gradually increasing the weight, you can see improvements in your overall arm and shoulder strength.
Related video of Db Rolling Triceps Extensions: A Guide to Proper Form and Benefits

Stretching is an essential part of any workout routine. It helps to improve flexibility, prevent injuries, and reduce muscle soreness. Stretching your glute muscles is particularly important because your glutes are one of the largest muscle groups in your body. In this article, we will discuss how to stretch your glute muscles properly.
Why Stretching Glute Muscles is Important

The glute muscles are responsible for hip extension, rotation, and abduction. They are also involved in stabilizing your pelvis and lower back. Tight glute muscles can cause imbalances in your body and lead to lower back pain, hip pain, and knee pain. Stretching your glute muscles regularly can help to prevent these issues.
Top 5 Glute Stretches

Here are the top 5 glute stretches that you can do to improve your flexibility and prevent injuries:
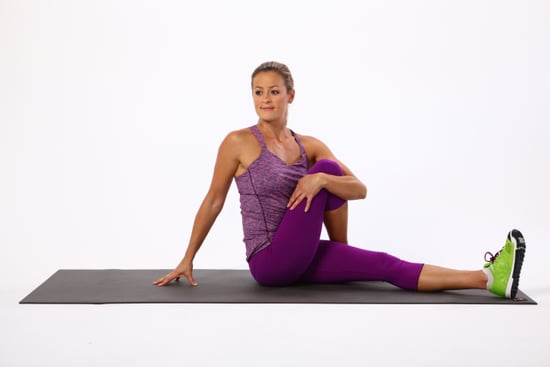
1. Figure 4 Stretch

This stretch targets your glutes and hip flexors. Start by lying on your back with your knees bent and feet flat on the floor. Cross your right ankle over your left knee and pull your left knee towards your chest. Hold for 30 seconds and then switch sides.
2. Pigeon Pose

This yoga pose is great for stretching your glutes, hips, and lower back. Start on all fours and bring your right knee forward towards your right hand. Extend your left leg behind you and lower your body to the ground. Hold for 30 seconds and then switch sides.
3. Seated Forward Fold

This stretch targets your hamstrings and glutes. Sit on the floor with your legs extended in front of you. Reach forward and try to touch your toes. Hold for 30 seconds.
4. Lizard Pose

This yoga pose is great for stretching your hip flexors, quads, and glutes. Start in a high plank position and bring your right foot to the outside of your right hand. Lower your left knee to the ground and sink into the stretch. Hold for 30 seconds and then switch sides.
5. Butterfly Stretch
This stretch targets your inner thighs, hips, and glutes. Sit on the floor with the soles of your feet together and your knees bent out to the sides. Hold your feet with your hands and gently push your knees towards the ground. Hold for 30 seconds.
How to Stretch Glute Muscles Properly

When stretching your glute muscles, it's important to do it properly to avoid injury. Here are some tips:
- Warm-up before stretching
- Breathe deeply and relax
- Hold each stretch for 30 seconds
- Don't bounce or force the stretch
- Stop if you feel pain
Conclusion
Stretching your glute muscles is important for maintaining good posture, preventing injuries, and reducing muscle soreness. Incorporate these glute stretches into your workout routine and remember to do them properly.
Related video of How To Stretch Glute Muscles

If you're looking for a powerful workout machine that can help you build strength, endurance, and muscle, then the Hammer Strength Cable Machine is an excellent choice. This machine is designed to provide a full-body workout that targets multiple muscle groups at once, making it ideal for anyone who wants to get in shape and build a stronger, healthier body.
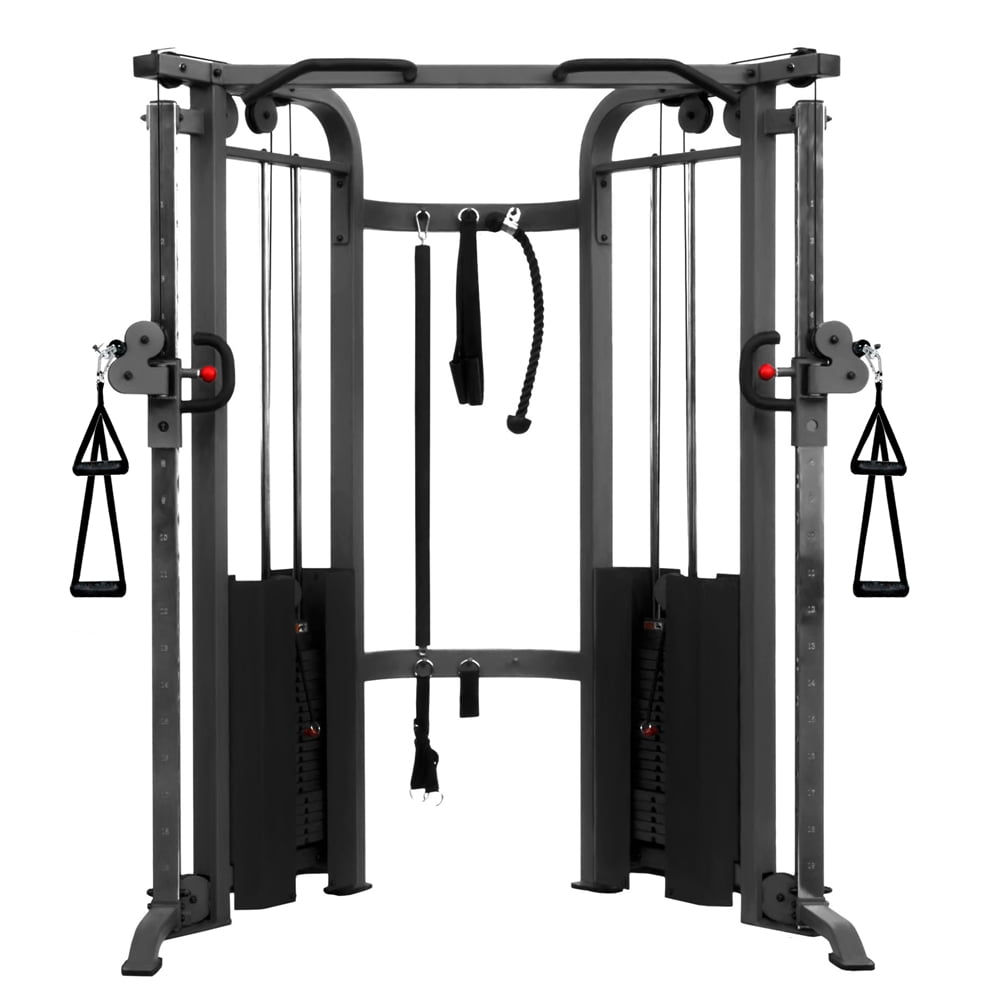
What is the Hammer Strength Cable Machine?

The Hammer Strength Cable Machine is a state-of-the-art workout machine that uses adjustable resistance cables to provide a full-body workout. It consists of several components, including a weight stack, pulleys, cables, and handles. The machine allows you to perform a wide range of exercises, including squats, lunges, chest presses, rows, and more.
Benefits of Using the Hammer Strength Cable Machine

There are many benefits to using the Hammer Strength Cable Machine for your workouts. Some of the key benefits include:
- Efficient full-body workout
- Adjustable resistance for all fitness levels
- Targets multiple muscle groups at once
- Reduces risk of injury
- Improves overall strength and endurance
Exercises You Can Do on the Hammer Strength Cable Machine

The Hammer Strength Cable Machine allows you to perform a wide range of exercises that target different muscle groups in your body. Here are some of the most popular exercises:
- Standing cable chest press
- Seated cable row
- Standing cable bicep curl
- Cable tricep pushdown
- Cable leg press
- Cable squat
How to Use the Hammer Strength Cable Machine
Using the Hammer Strength Cable Machine is easy and straightforward. Here are the basic steps:
- Adjust the weight stack to your desired weight
- Select the handle or attachment you want to use
- Attach the handle to the cable
- Stand or sit in the correct position for the exercise
- Perform the exercise by pulling or pushing the handle
- Repeat for the desired number of reps and sets
Tips for Getting the Most Out of Your Hammer Strength Cable Machine Workouts

If you want to get the most out of your Hammer Strength Cable Machine workouts, here are some tips to keep in mind:
- Start with a light weight and gradually increase the resistance
- Focus on proper form and technique to avoid injury
- Vary your workouts by changing the handles or attachments
- Include both upper body and lower body exercises in your routine
- Use the machine as part of a well-rounded fitness program that includes cardio and flexibility training
Conclusion
The Hammer Strength Cable Machine is a versatile and effective workout machine that can help you build strength, endurance, and muscle. With its adjustable resistance, multiple exercises, and ease of use, it's a great choice for anyone looking to improve their fitness and overall health.
Related video of Hammer Strength Cable Machine: The Ultimate Workout Machine for Strength Training
When it comes to building a strong core, sit-ups are a classic exercise that many people turn to. However, if you want to take your sit-ups to the next level, incorporating weights into your routine can provide a more challenging workout and help you build even stronger abs.
Why Use Weights for Sit-Ups?

Adding weights to your sit-up routine can provide a number of benefits. First and foremost, it increases the resistance of the exercise, making it more challenging and helping to build stronger abdominal muscles. Additionally, using weights can help to engage other muscle groups, such as your hip flexors and lower back, providing a more comprehensive workout.
How to Do Sit-Ups With Weights

Before you start incorporating weights into your sit-up routine, it's important to make sure you're doing the exercise correctly. To perform a sit-up with weights:
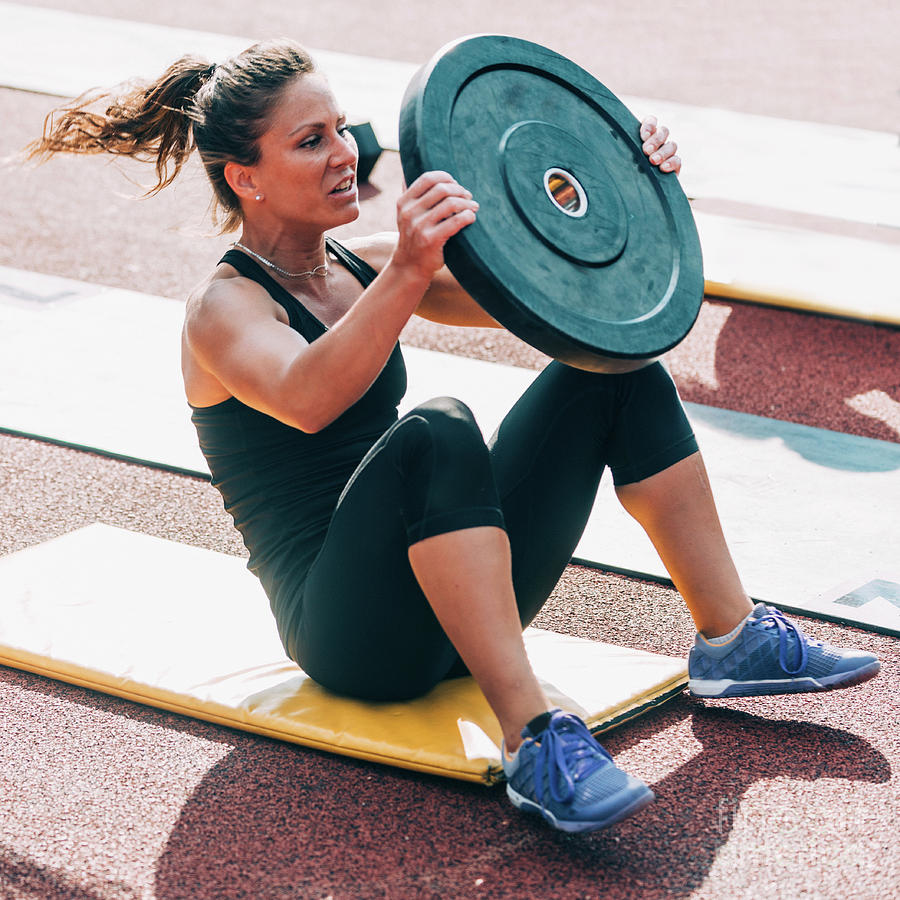
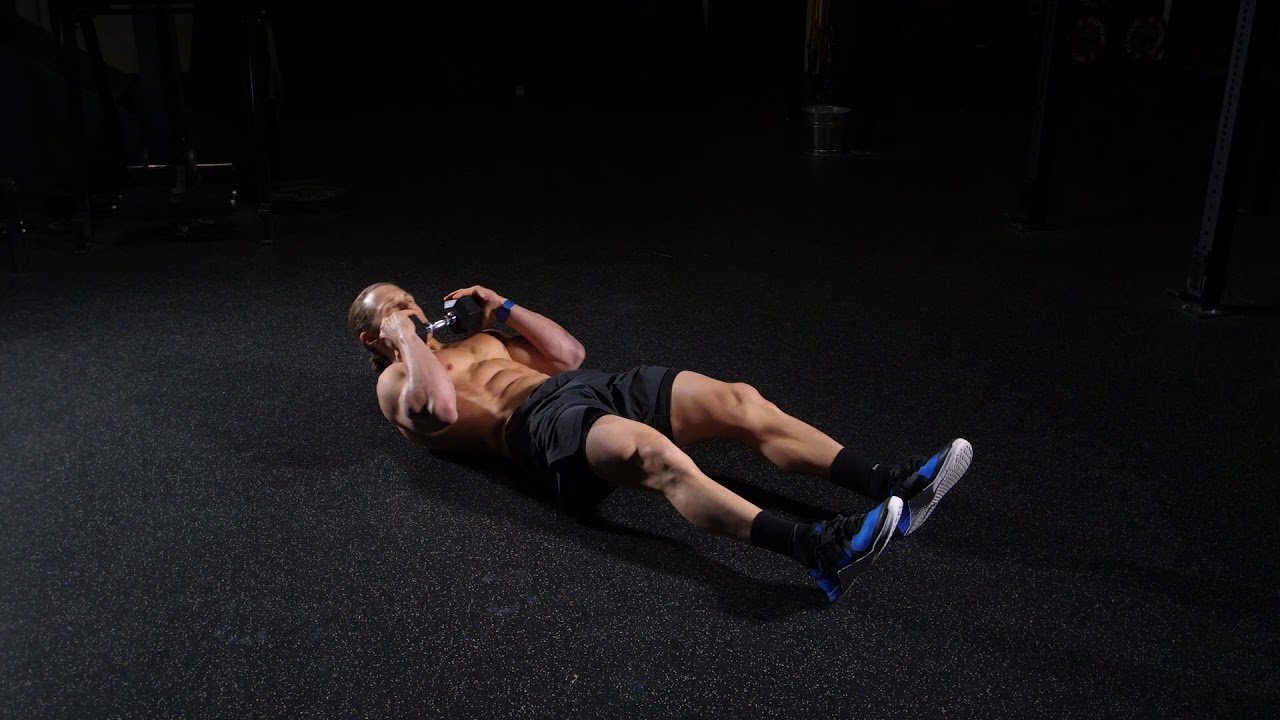
- Lie on your back with your feet flat on the ground and your knees bent.
- Hold a weight plate or dumbbell against your chest with both hands.
- Engage your core and sit up, keeping your feet planted on the ground.
- Hold the sit-up position for a moment before slowly lowering yourself back down.
- Repeat for your desired number of reps.
It's important to start with a weight that you can comfortably handle and gradually increase the weight as you get stronger.
Other Ways to Incorporate Weights into Your Core Routine

Sit-ups aren't the only exercise where you can incorporate weights to strengthen your core. Here are a few other exercises that you can try:
- Weighted Russian twists
- Weighted plank holds
- Weighted leg raises
- Weighted crunches
By incorporating these exercises into your routine, you can provide a more well-rounded workout for your core muscles.
Precautions to Take
While sit-ups with weights can be a great way to strengthen your core, it's important to take the proper precautions to avoid injury. Here are a few things to keep in mind:
- Start with a weight that you can comfortably handle and gradually increase the weight as you get stronger.
- Make sure the weight is securely held against your chest and doesn't shift during the exercise.
- Avoid pulling on your neck or using momentum to complete the movement.
- If you experience any pain or discomfort during the exercise, stop immediately and consult a healthcare professional.
Conclusion
Sit-ups with weights can be a challenging and effective way to build stronger abs and improve your overall core strength. By incorporating these exercises into your routine, you can take your workout to the next level and achieve your fitness goals.
Related video of Sit Ups With Weights: A Guide to Building Stronger Abs

Are you looking for an effective way to strengthen and tone your shoulders? Look no further than the side lateral to front raise! This exercise targets the deltoid muscles, which are responsible for shoulder movement and stability.
What is the Side Lateral to Front Raise?

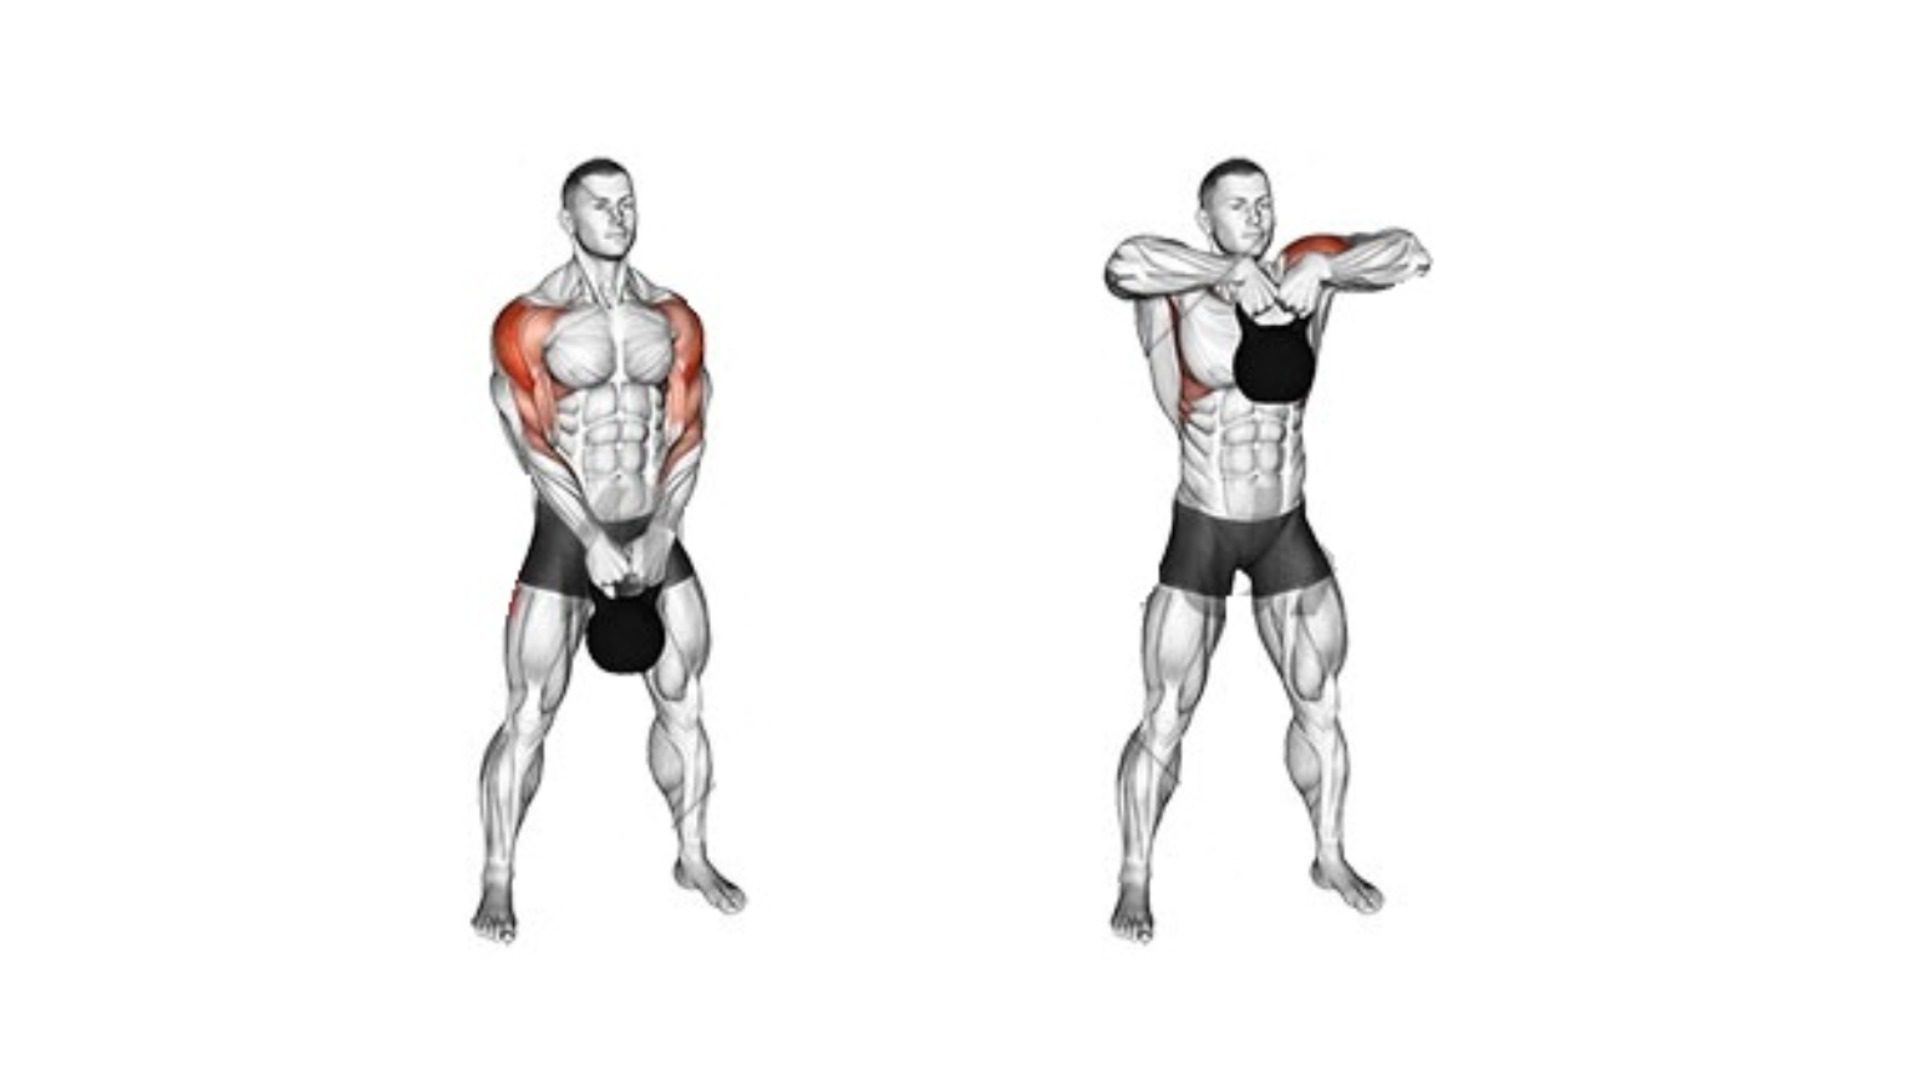
The side lateral to front raise is a compound exercise that combines two movements: the side lateral raise and the front raise. In the first part of the exercise, you lift the dumbbells out to the sides, keeping your elbows slightly bent and your palms facing down. In the second part, you rotate your arms so that your palms face forward and lift the dumbbells straight in front of you until they reach shoulder height.
How to Perform the Side Lateral to Front Raise

To perform the side lateral to front raise, follow these steps:
- Stand with your feet shoulder-width apart and hold a dumbbell in each hand, palms facing your thighs.
- Lift the dumbbells out to the sides, keeping your elbows slightly bent and your palms facing down. Stop when your arms are parallel to the ground.
- Rotate your arms so that your palms face forward.
- Lift the dumbbells straight in front of you until they reach shoulder height.
- Lower the dumbbells back down to the starting position.
- Repeat for the desired number of reps.
Tips for Proper Form

Proper form is essential for getting the most out of the side lateral to front raise. Here are some tips to help you perform the exercise correctly:
- Keep your elbows slightly bent throughout the movement.
- Don't swing your arms or use momentum to lift the dumbbells.
- Keep your shoulders down and back, away from your ears.
- Engage your core to maintain proper posture.
- Breathe in as you lift the dumbbells, and breathe out as you lower them.
- Use a weight that is challenging but allows you to maintain proper form.
Variations of the Side Lateral to Front Raise

There are several variations of the side lateral to front raise that you can try to add variety to your shoulder workout:
- Single-arm side lateral to front raise: Perform the exercise with one arm at a time.
- Arnold press: Start with the dumbbells at shoulder height, palms facing you. As you lift the dumbbells, rotate them so that your palms face forward.
- Bent-over side lateral to front raise: Bend over at the waist and lift the dumbbells out to the sides, keeping your elbows slightly bent.
Benefits of the Side Lateral to Front Raise

The side lateral to front raise offers several benefits for your shoulders:
- Strengthens and tones the deltoid muscles.
- Improves shoulder stability and mobility.
- Helps prevent injuries by strengthening the muscles that support the shoulder joint.
- Can be done with dumbbells or resistance bands, making it a versatile exercise that can be done at home or in the gym.
Conclusion
The side lateral to front raise is a simple yet effective exercise that can help you achieve stronger, more toned shoulders. By following proper form and incorporating variations into your workout routine, you can maximize the benefits of this compound exercise. So grab some dumbbells and get lifting!
