
Single leg squats on bench are an excellent exercise for strengthening your legs. They work your quads, glutes, and hamstrings, and can help improve your balance and stability. This exercise is also great for athletes who need to develop strength in their legs for running, jumping, or other sports activities.
How to Do Single Leg Squats on Bench
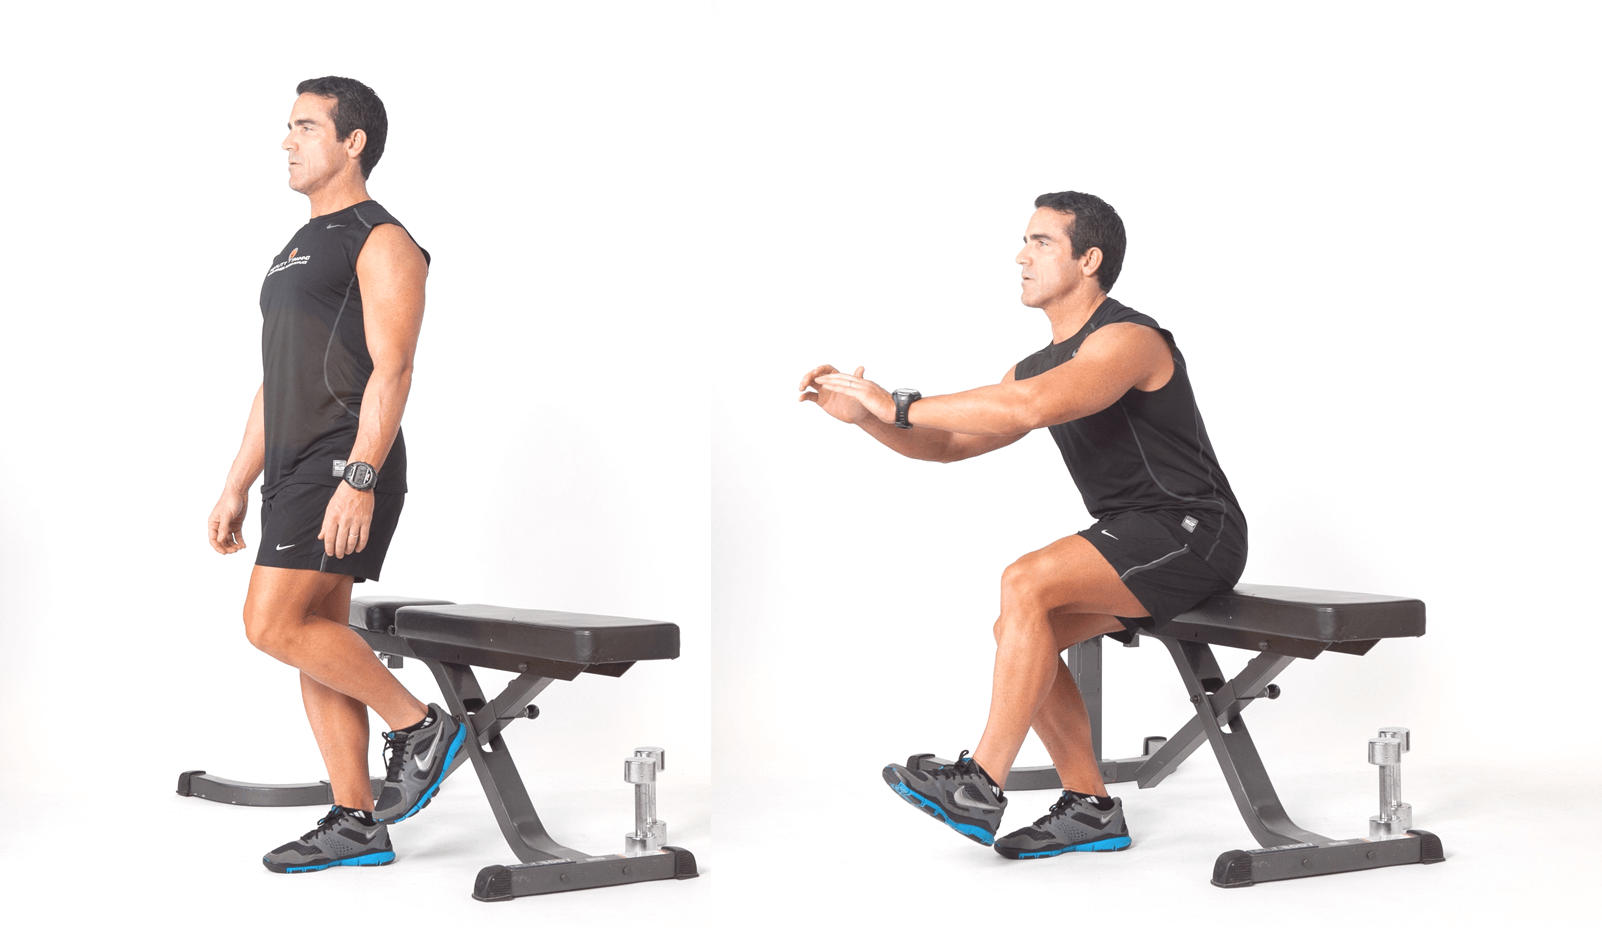
To perform single leg squats on bench, you will need a bench or a sturdy chair. Here are the steps to follow:
- Start by standing in front of the bench with your legs shoulder-width apart.
- Lift one leg off the ground and extend it in front of you.
- Slowly lower your body down towards the bench by bending your standing leg.
- Lower your body until your butt touches the bench.
- Pause for a moment, then push yourself back up to the starting position.
- Repeat the exercise for the desired number of reps, then switch legs and repeat.

Tips for Doing Single Leg Squats on Bench
Here are some tips to help you perform single leg squats on bench correctly:
- Keep your chest up and your back straight throughout the exercise.
- Make sure your knee doesn't go past your toes when you lower your body.
- Do the exercise slowly and with control to avoid injury.
- If you're having trouble balancing, hold onto something for support.

Variations of Single Leg Squats on Bench
If you want to make single leg squats on bench more challenging, here are some variations you can try:
- Add weights: Hold a dumbbell or kettlebell in one hand while doing the exercise.
- Elevate your foot: Place a small step or book under your elevated foot to increase the range of motion.
- Use a stability ball: Place a stability ball between your back and the wall and do the exercise while balancing on one leg.
Benefits of Single Leg Squats on Bench
Single leg squats on bench offer several benefits, including:
- Strengthening your legs: This exercise targets your quads, glutes, and hamstrings, helping to make them stronger.
- Improving balance and stability: Since you're standing on one leg, single leg squats on bench can help improve your balance and stability.
- Reducing risk of injury: Strengthening your legs can help reduce your risk of injury during sports or other activities.

Conclusion
Single leg squats on bench are an excellent exercise for leg strengthening. They target your quads, glutes, and hamstrings, and can help improve your balance and stability. This exercise is also great for athletes who need to develop leg strength for sports activities. Remember to perform single leg squats on bench slowly and with control, and use proper form to avoid injury. Start with a few reps and gradually increase the number as you get stronger.
Related video of Single Leg Squats On Bench: A Great Exercise for Leg Strengthening

The seated chest press with dumbbells is a great exercise that can help you build a strong and defined chest. This exercise is perfect for those who don't have access to a gym or prefer to work out at home. In this article, we'll cover everything you need to know about the seated chest press with dumbbells, including the benefits, how to perform the exercise correctly, and some tips to make it more effective.
Benefits of Seated Chest Press With Dumbbells

There are several benefits of the seated chest press with dumbbells. One of the main benefits is that it helps to build a strong and defined chest. This exercise also works your triceps and shoulders, which can help to improve your overall upper body strength. Additionally, the seated position helps to stabilize your body, which can reduce your risk of injury.
How to Perform Seated Chest Press With Dumbbells
To perform the seated chest press with dumbbells, follow these steps:
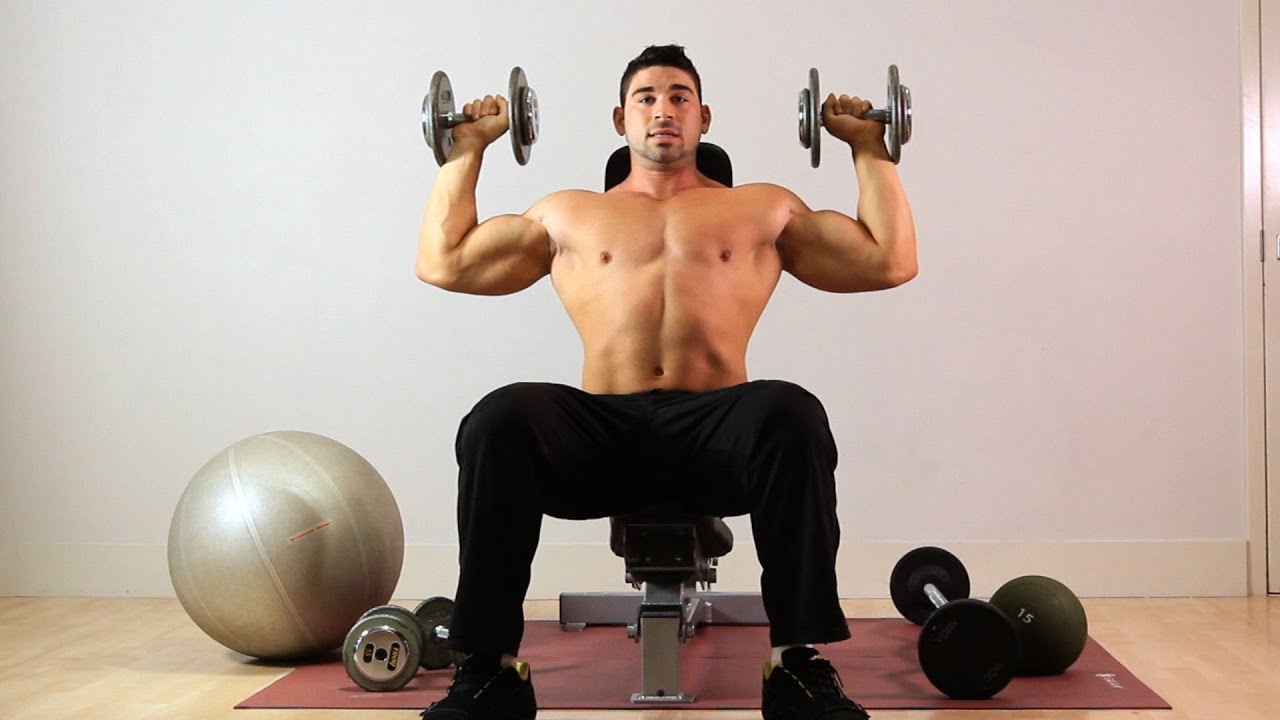
- Sit on a bench with your feet flat on the floor and your back straight.
- Hold a dumbbell in each hand with your palms facing forward.
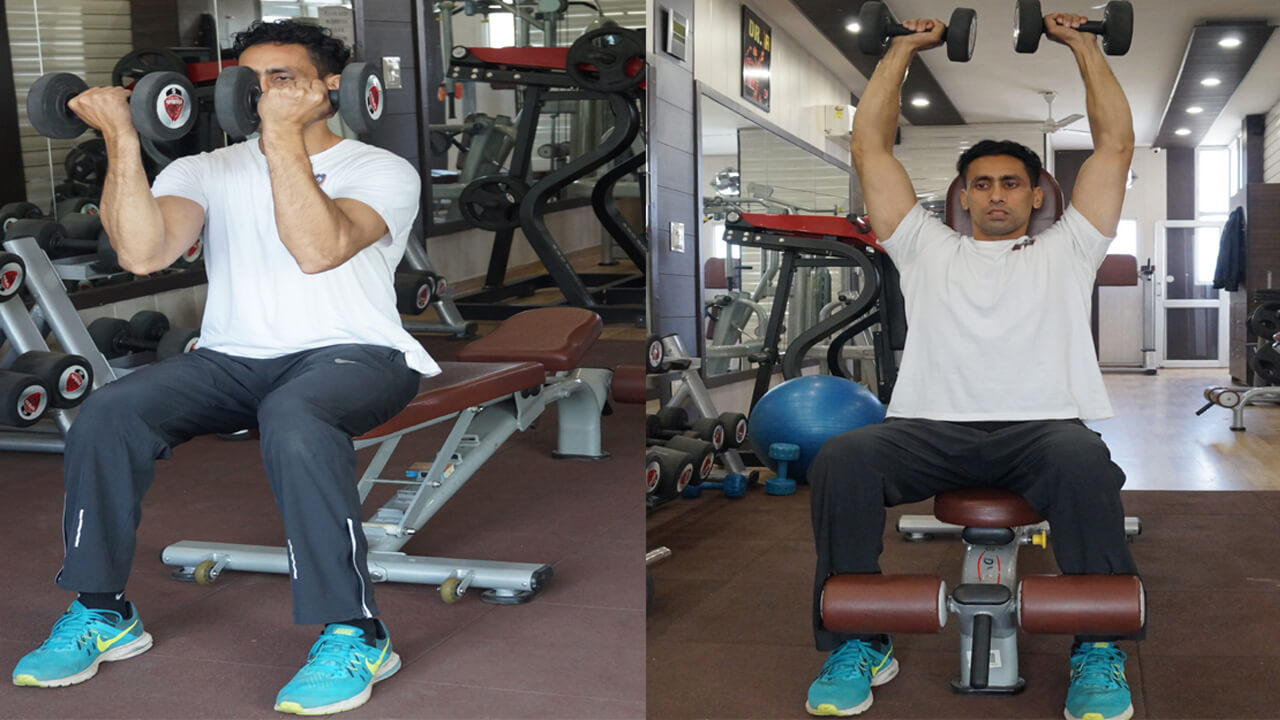
- Bring the dumbbells up to shoulder height, with your elbows bent and your upper arms parallel to the floor.
- Press the dumbbells up and away from your body, extending your arms fully.
- Pause at the top of the movement, then slowly lower the dumbbells back to the starting position.
- Repeat for the desired number of reps.
It's important to keep your back straight and your core engaged throughout the exercise. You should also breathe out as you press the dumbbells up and breathe in as you lower them back down.
Tips for Making Seated Chest Press With Dumbbells More Effective
Here are some tips to help you make the seated chest press with dumbbells more effective:
- Use a weight that challenges you but allows you to maintain proper form.
- Vary your grip by using a neutral grip (palms facing each other) or a pronated grip (palms facing away from your body).
- Focus on squeezing your chest muscles at the top of the movement.
- Try using a slow and controlled tempo to increase the time under tension and maximize muscle growth.
- Incorporate other chest exercises, such as push-ups and chest flyes, into your workout routine for more variety.
Conclusion
The seated chest press with dumbbells is a great exercise for building a strong and defined chest. By following the steps outlined in this article and incorporating some of our tips, you can make this exercise more effective and get the most out of your workout. Remember to start with a weight that challenges you but allows you to maintain proper form, and to breathe out as you press the dumbbells up and breathe in as you lower them back down.
Related video of Seated Chest Press With Dumbbells: A Complete Guide
The hip joint is one of the most important joints in our body. It is responsible for supporting our body weight and provides stability and mobility to the lower body. The hip joint has a wide range of motion and can perform various movements such as flexion, extension, abduction, adduction, and rotation. In this article, we will discuss hip abduction and adduction and their importance in maintaining good hip health.
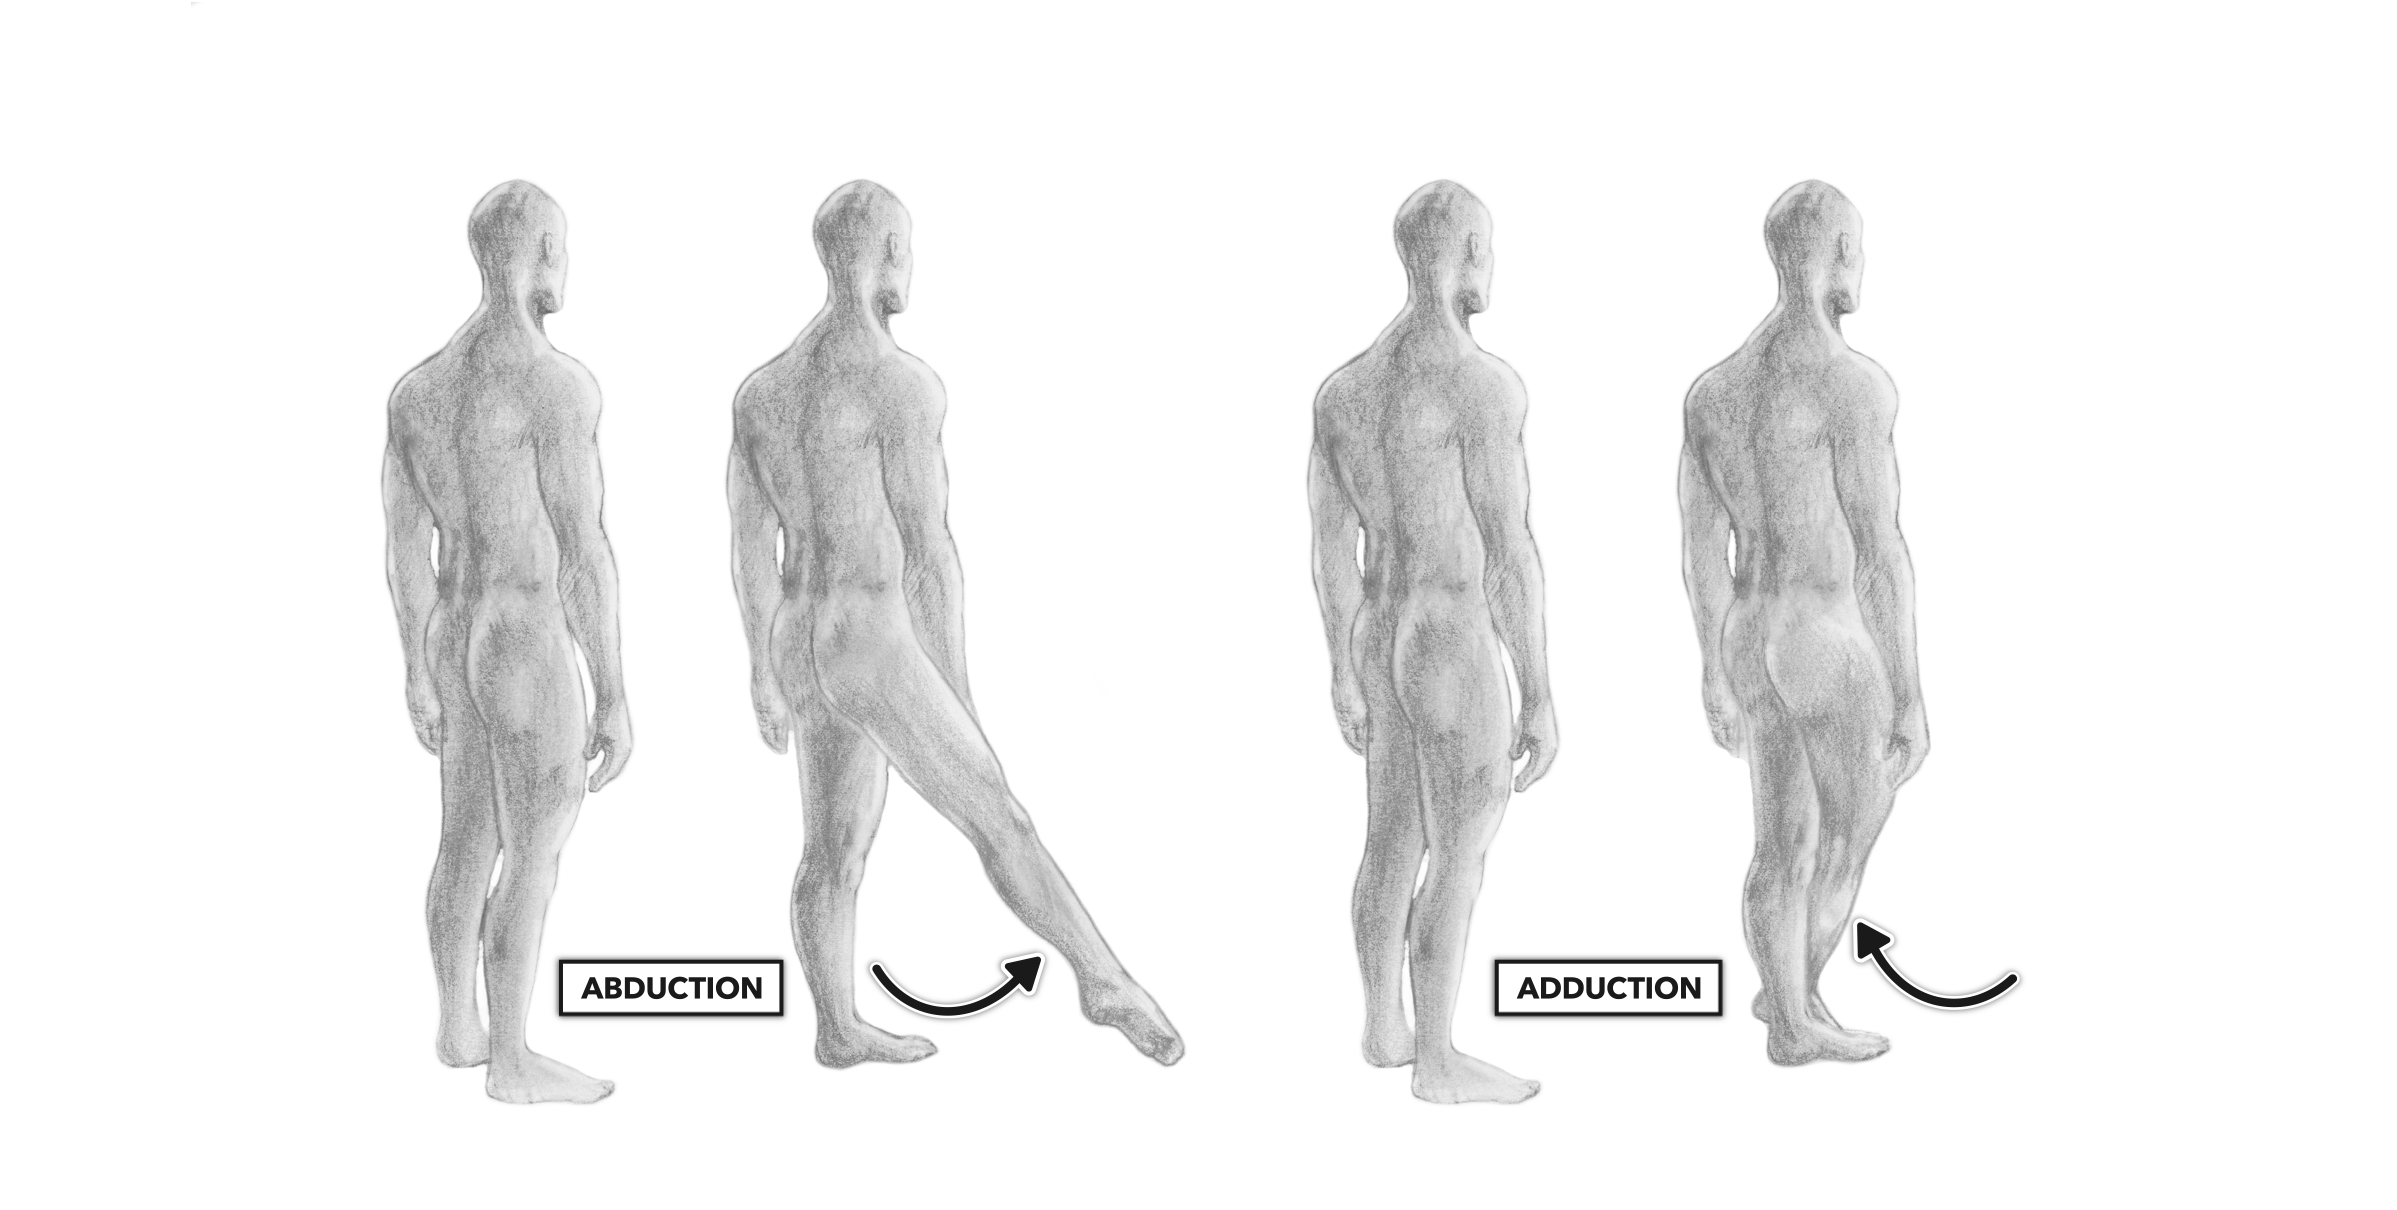
What is Hip Abduction and Adduction?
Hip abduction and adduction are two important movements that involve the lateral and medial movement of the thigh bone away from and towards the midline of the body, respectively. Hip abduction is the movement of the thigh bone away from the midline of the body, while hip adduction is the movement of the thigh bone towards the midline of the body.
During hip abduction, the gluteus medius and minimus muscles, which are located on the side of the hip, are activated. These muscles are responsible for stabilizing the pelvis and maintaining balance during single-leg activities such as walking and running. Hip adduction, on the other hand, involves the activation of the adductor muscles, which are located on the inner thigh. These muscles are responsible for bringing the thigh bone towards the midline of the body and are important for activities such as jumping and lateral movements.
Importance of Hip Abduction and Adduction
Hip abduction and adduction are important for maintaining good hip health and preventing hip injuries. A strong hip abductor and adductor muscles can help to stabilize the pelvis and reduce the risk of hip injuries such as hip impingement and labral tears. These muscles also play an important role in improving athletic performance, especially in sports that require lateral movements such as basketball and soccer.
Poor hip abduction and adduction strength can lead to compensations in other parts of the body, such as the lower back and knees. This can result in pain and dysfunction in these areas, which can affect overall mobility and quality of life. Therefore, it is important to include hip abduction and adduction exercises in your workout routine to maintain good hip health.
Exercises for Hip Abduction and Adduction
There are many exercises that can help to strengthen the hip abductor and adductor muscles. Some of the most effective exercises include:
- Side-lying leg lift: Lie on your side with your legs straight. Lift your top leg towards the ceiling and lower it back down. Repeat for 10-15 reps on each side.
- Clamshell: Lie on your side with your knees bent and your feet together. Keeping your feet together, raise your top knee towards the ceiling and lower it back down. Repeat for 10-15 reps on each side.
- Resistance band abduction: Tie a resistance band around your ankles and stand with your feet shoulder-width apart. Keeping your legs straight, lift one leg out to the side and lower it back down. Repeat for 10-15 reps on each side.
- Resistance band adduction: Tie a resistance band around your ankles and stand with your feet shoulder-width apart. Keeping your legs straight, bring one leg across your body towards the opposite leg and then back out to the side. Repeat for 10-15 reps on each side.

Conclusion
Hip abduction and adduction are important movements that play a crucial role in maintaining good hip health and preventing hip injuries. By including hip abduction and adduction exercises in your workout routine, you can strengthen these muscles and improve your overall hip function. Remember to consult with a healthcare professional before starting any new exercise routine and always listen to your body to avoid injury.
Related video of Hip Abduction And Adduction: Importance and Benefits
If you are looking for a way to relieve tension and pain in your hips, foam rolling might be the solution you need. Foam rolling is a form of self-massage that can help you to loosen tight muscles, improve circulation, and increase range of motion. In this article, we will discuss some of the best foam roller exercises for hips that you can do at home.
Why Use a Foam Roller?

Foam rollers are cylindrical pieces of foam that are used to massage and stretch muscles. They can be used on any part of the body, but they are particularly effective for working on the hips. Using a foam roller can help to break up knots in the muscles, increase circulation, and improve flexibility. Foam rolling is also a great way to warm up before exercise and to cool down afterwards.
How to Use a Foam Roller
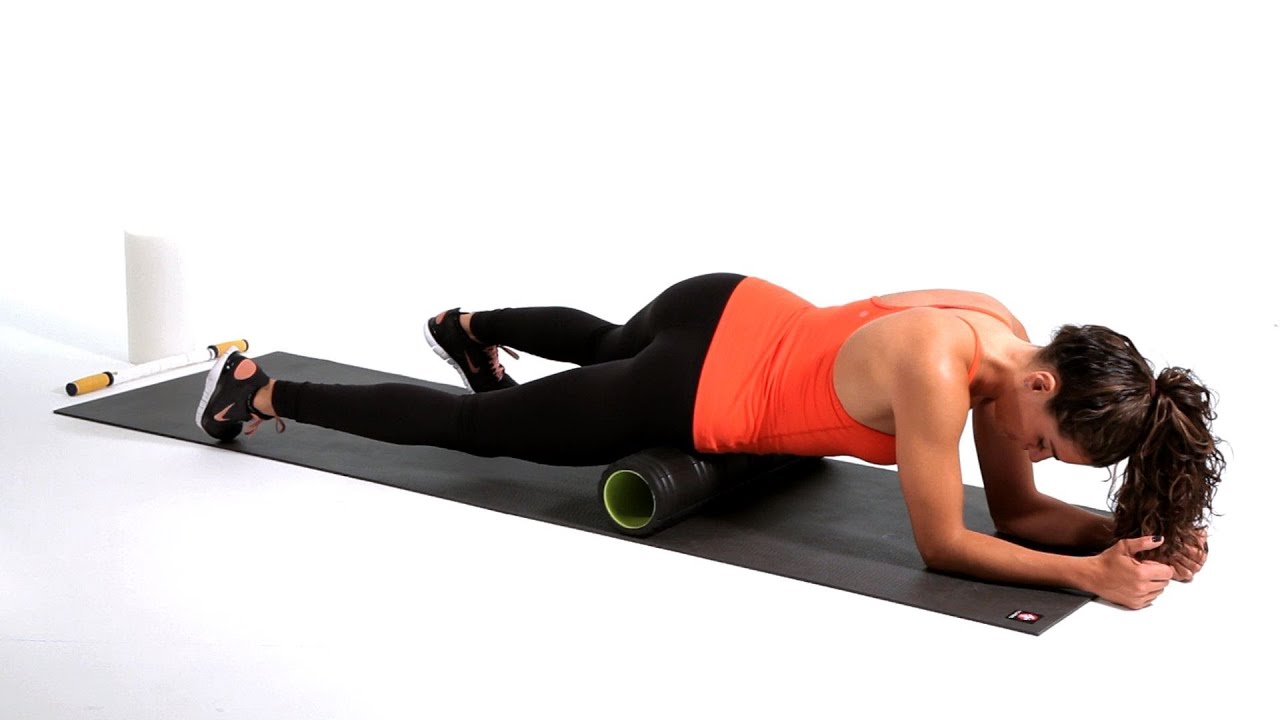
Before you begin any foam roller exercises, it is important to know how to use the foam roller correctly. Start by lying on your side with the foam roller under your hip. Slowly roll back and forth, using your bodyweight to apply pressure to the roller. If you find a particularly tight spot, stop and hold the roller on that spot for a few seconds before continuing to roll.
It is important to use slow, controlled movements when foam rolling. Avoid rolling too quickly or putting too much pressure on the roller, as this can cause more harm than good.
Best Foam Roller Exercises for Hips

Here are some of the best foam roller exercises for hips:
1. Hip Flexor Roll
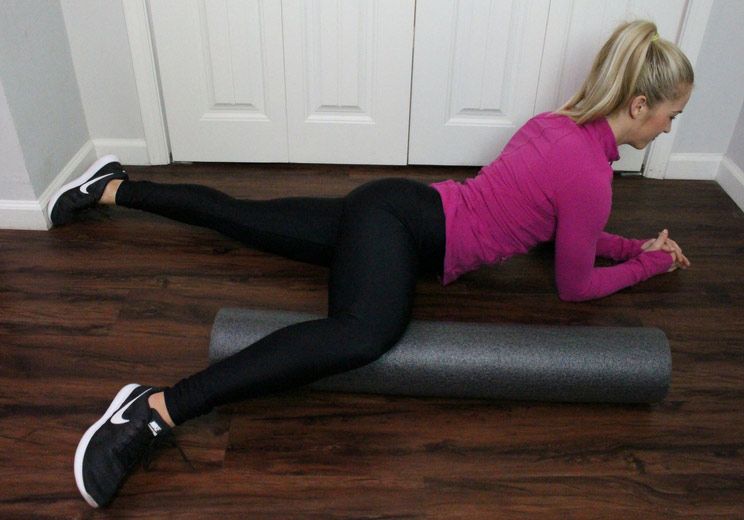
Lie face down with the foam roller under your hip flexors. Slowly roll back and forth, using your bodyweight to apply pressure to the roller. You can also turn your leg in and out to hit different areas of the hip flexors.
2. Glute Roll
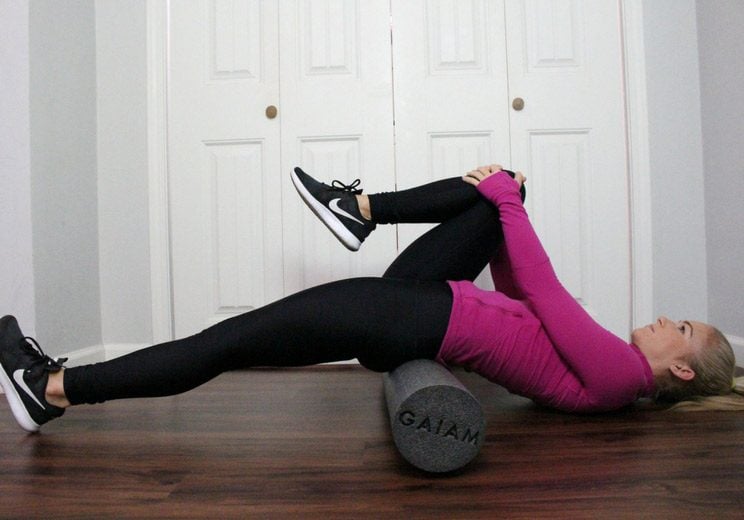
Sit on the foam roller with one foot crossed over the opposite knee. Roll back and forth, using your bodyweight to apply pressure to the roller. You can also twist your body to hit different areas of the glutes.
3. IT Band Roll
Lie on your side with the foam roller under your hip. Slowly roll down your leg towards your knee, using your bodyweight to apply pressure to the roller. You can also turn your leg in and out to hit different areas of the IT band.

4. Piriformis Roll
Sit on the foam roller with one foot crossed over the opposite knee. Roll back and forth, using your bodyweight to apply pressure to the roller. You can also lean to one side to hit the piriformis muscle.

Conclusion
Foam rolling is a great way to relieve tension and pain in your hips. By using the foam roller correctly and doing these exercises regularly, you can improve your flexibility, increase circulation, and reduce the risk of injury. Remember to always listen to your body and stop if you feel any pain or discomfort.
Related video of Foam Roller Exercises For Hips

Diamond push up is an intense variation of the regular push up that engages the triceps and chest muscles more effectively. It is a great exercise to build upper body strength and endurance. However, doing diamond push ups with improper form can lead to injuries and ineffective results. In this article, we will discuss the proper diamond push up form and technique.
What are Diamond Push Ups?
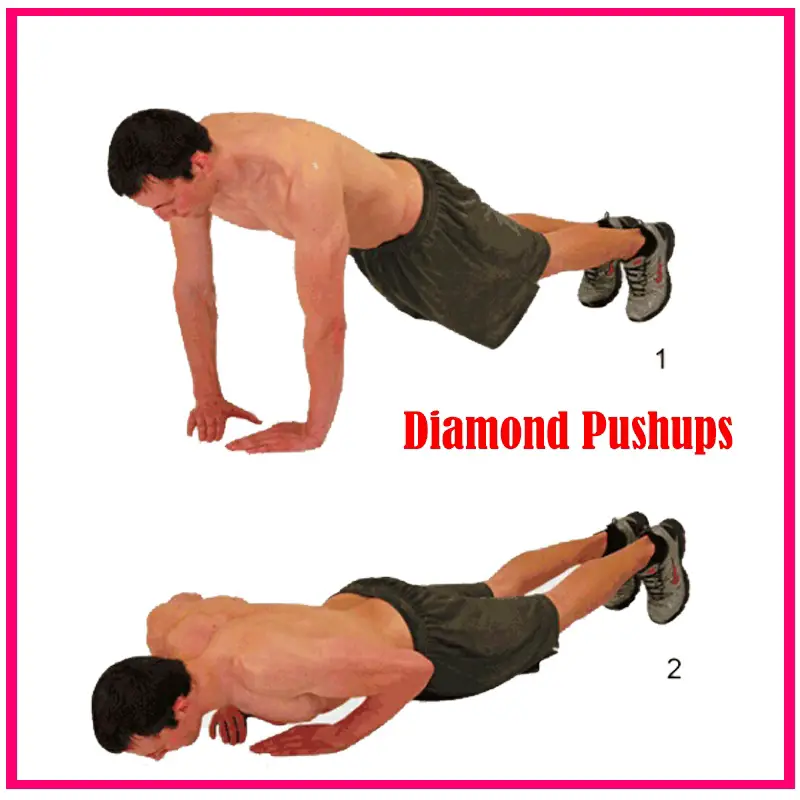
Diamond push ups are a variation of push ups where the hands are placed close together, forming a diamond shape with the fingers. This hand placement targets the triceps, chest, and shoulder muscles more effectively than regular push ups. Diamond push ups are also known as triangle push ups or narrow push ups.
How to Do Diamond Push Ups?
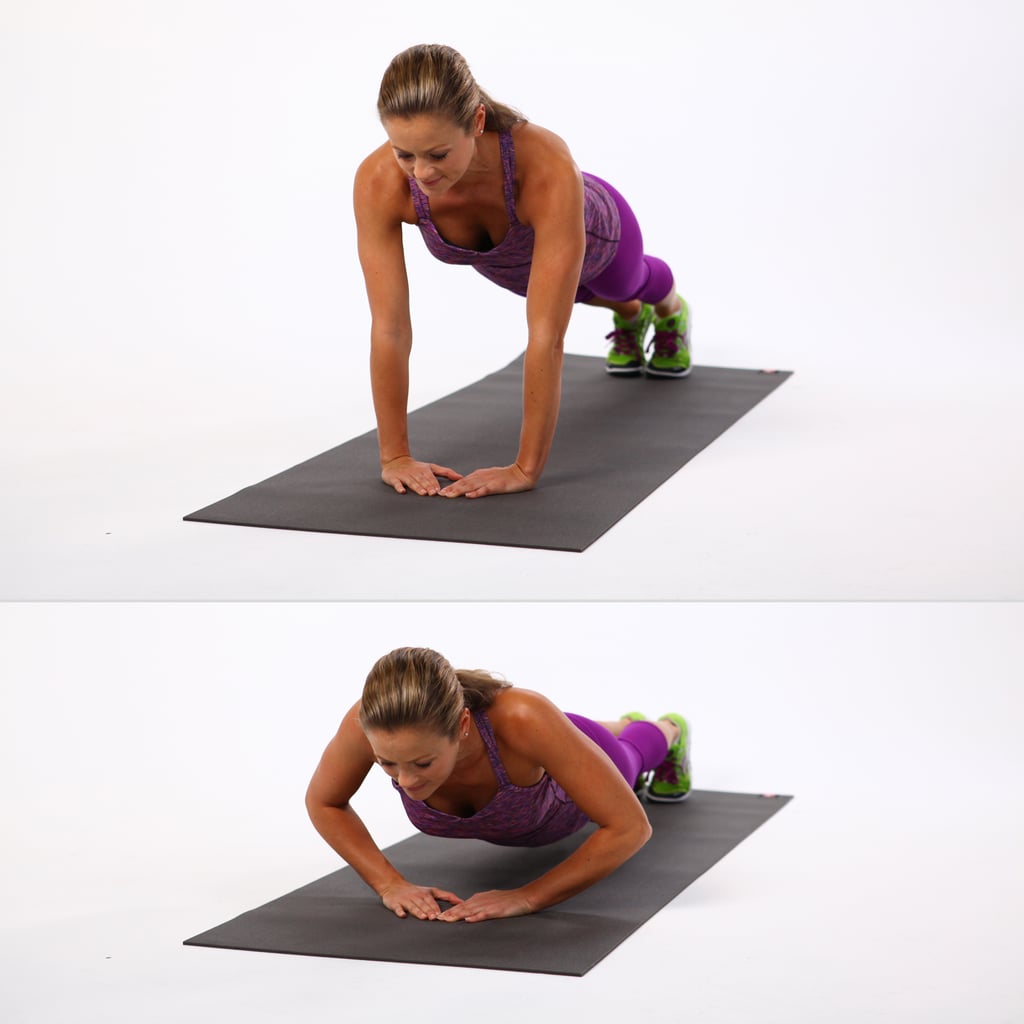
Follow these steps to do a proper diamond push up:
- Get into a plank position with your hands placed close together, forming a diamond shape with your fingers.
- Keep your elbows close to your body and lower your chest towards your hands.
- Keep your core engaged and your body straight.
- Push yourself back up to the starting position.
- Repeat for desired reps.
Common Mistakes to Avoid

Here are some common mistakes to avoid while doing diamond push ups:
- Flaring your elbows out too wide can put extra stress on your shoulders and lead to injuries. Keep your elbows close to your body.
- Arching your back or letting your hips sag can put extra stress on your lower back. Keep your core engaged and your body straight.
- Not going low enough can make the exercise less effective. Lower your chest towards your hands as much as you can while maintaining proper form.
Variations of Diamond Push Ups

Here are some variations of diamond push ups that you can try:
- Decline diamond push ups: Place your feet on an elevated surface to increase the difficulty.
- Weighted diamond push ups: Hold a weight plate or dumbbell on your back to increase the resistance.
- Spiderman diamond push ups: Bring your knee towards your elbow as you lower yourself down.
Benefits of Diamond Push Ups
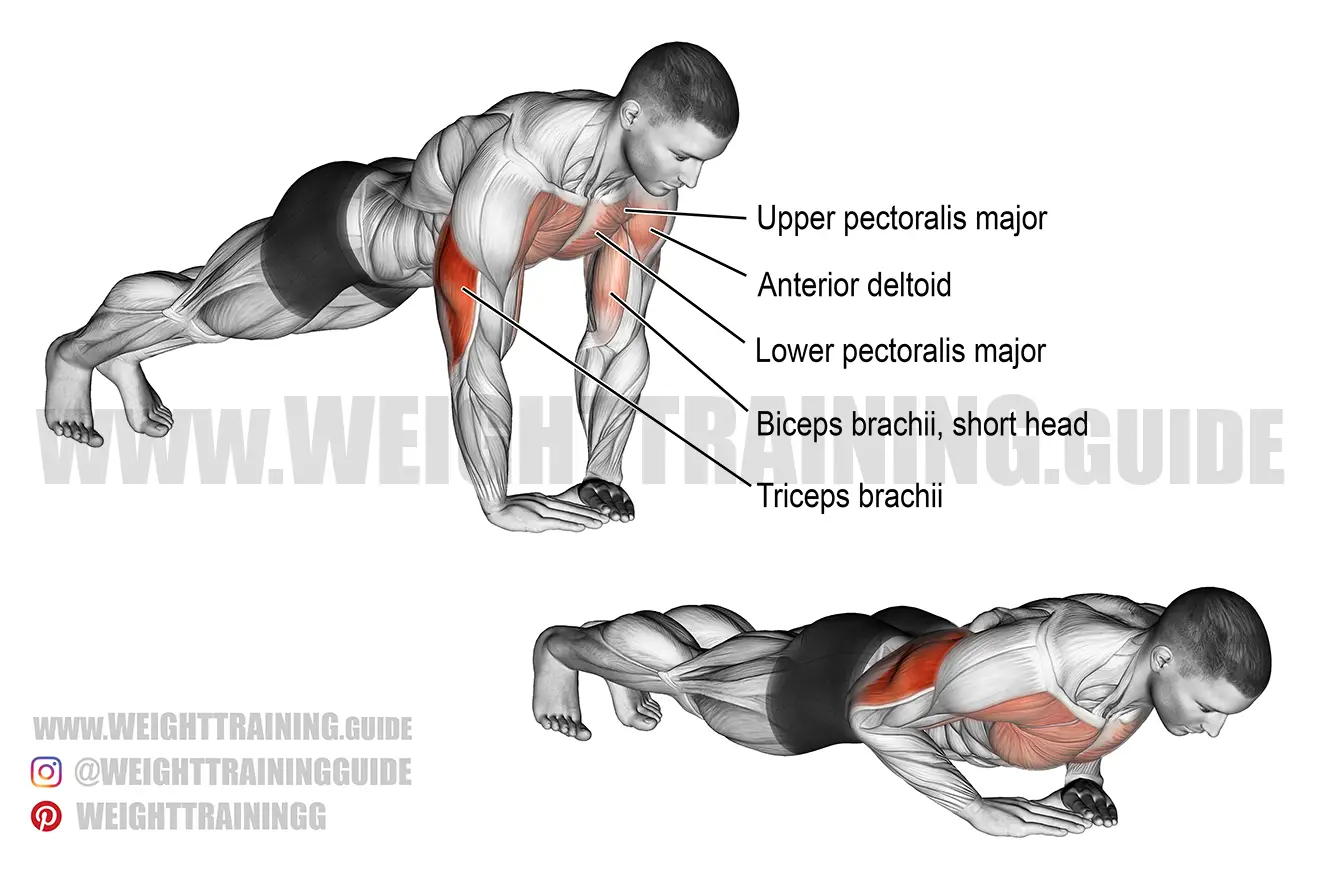
Diamond push ups offer several benefits, including:
- Increased triceps, chest, and shoulder strength.
- Improved upper body endurance and stability.
- Better posture and balance.
- Less strain on the wrists than other push up variations.
Conclusion
Diamond push ups are a great exercise to build upper body strength and endurance. By following the proper form and technique, you can avoid injuries and maximize the benefits. Remember to keep your elbows close to your body, engage your core, and lower your chest towards your hands. Try different variations to challenge yourself and keep your workouts interesting. Incorporate diamond push ups into your fitness routine and see the results for yourself!
Related video of Proper Diamond Push Up: A Comprehensive Guide

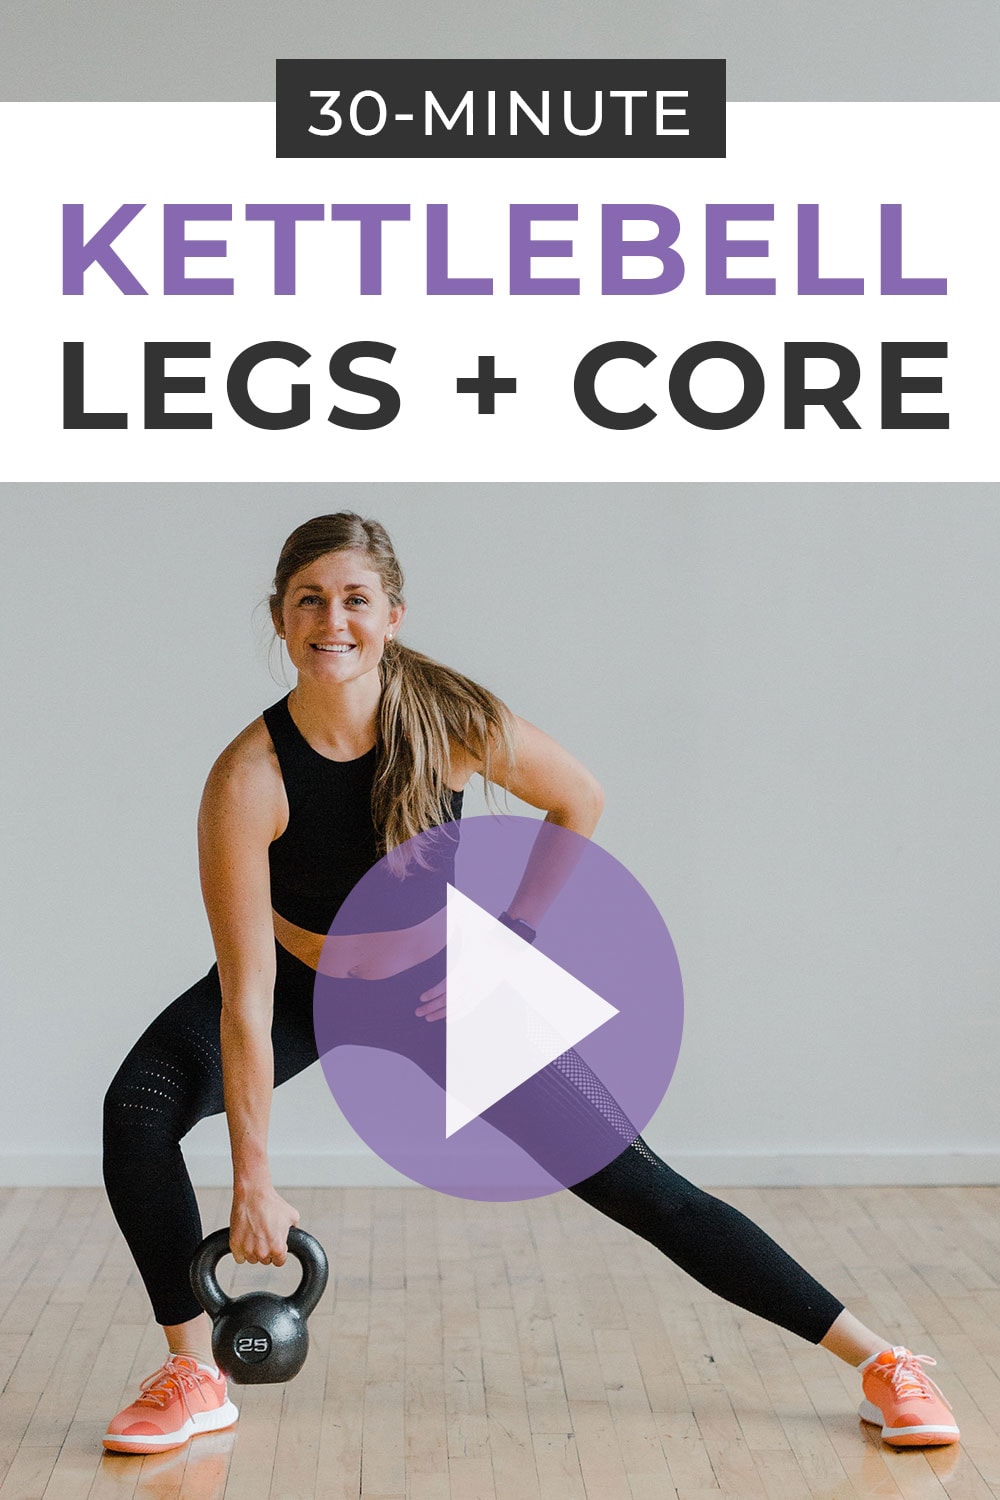
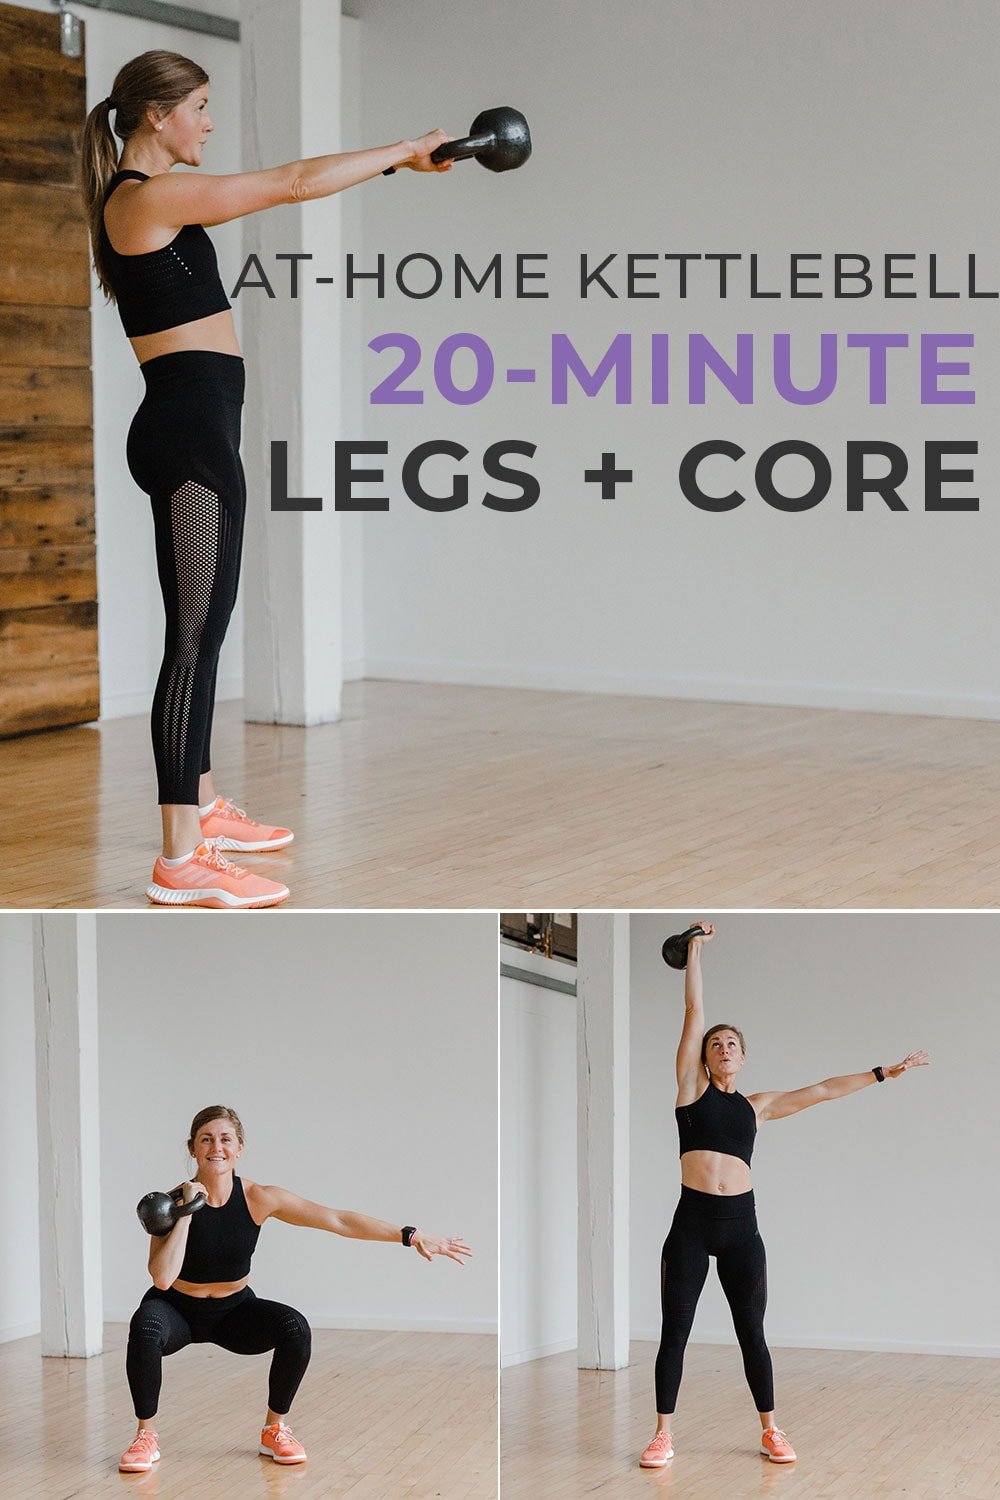
Are you looking for a challenging workout that will tone your abs? Look no further than the kettle bell ab workout. This workout is designed to target your core muscles and help you achieve a stronger, more defined midsection. Whether you are a beginner or an experienced fitness enthusiast, the kettle bell ab workout is a great addition to your exercise routine.
What is a Kettle Bell?

A kettle bell is a cast iron weight that looks like a cannonball with a handle. It is commonly used in strength training and is a great tool for working out your abs. Kettle bells come in various weights, so you can choose the one that is right for your fitness level.
The Benefits of a Kettle Bell Ab Workout

There are many benefits to incorporating a kettle bell ab workout into your fitness routine. First and foremost, it will help you achieve a stronger core. Strong core muscles are essential for good posture, balance, and stability. Additionally, the kettle bell ab workout can help you burn calories and lose weight. This workout is also great for improving your overall strength and endurance.
The Kettle Bell Ab Workout

Now that you know the benefits of a kettle bell ab workout, let's dive into the workout itself. Here are some of the best exercises to help you tone your abs with a kettle bell:
1. Russian Twists

Start in a seated position with your knees bent and feet flat on the floor. Hold the kettle bell with both hands at chest height. Twist your torso to the right, bringing the kettle bell to the outside of your right hip. Return to center and twist to the left, bringing the kettle bell to the outside of your left hip. Repeat for 10-15 reps.
2. Kettle Bell Sit-Ups
Lie on your back with your knees bent and feet flat on the floor. Hold the kettle bell with both hands at chest height. Perform a standard sit-up, keeping the kettle bell in front of your chest. Repeat for 10-15 reps.
3. Kettle Bell Plank Rows

Start in a plank position with your hands on the kettle bell handles. Keeping your core engaged, lift one kettle bell off the ground and row it towards your chest. Lower it back down and repeat with the other side. Repeat for 10-15 reps on each side.
4. Kettle Bell Windmills
Hold the kettle bell in your right hand and extend your arm straight up towards the ceiling. Rotate your left foot out to a 45-degree angle. Keeping your arm straight, hinge at the hips and lean towards your left foot. As you hinge, slide your left hand down your left leg. Return to standing and repeat for 10-15 reps on each side.
Conclusion
The kettle bell ab workout is a challenging and effective way to tone your abs and achieve a stronger core. By incorporating these exercises into your fitness routine, you can improve your posture, balance, and stability, while burning calories and building strength. Give it a try and see the results for yourself!
Related video of Kettle Bell Ab Workout

When we talk about a clean, we are referring to the process of removing dirt, dust, and other unwanted materials from a surface or space. Cleaning can be done in a variety of ways, including using chemicals, water, or a combination of both. The purpose of cleaning is to improve the appearance and hygiene of a space, as well as to reduce the risk of illness and disease.
The Importance of Cleaning

Cleaning is essential for maintaining a healthy and safe environment. Failure to clean regularly can lead to the accumulation of dirt, dust, and other contaminants, which can cause allergies, respiratory problems, and other health issues. Additionally, regular cleaning can help to prevent the spread of germs and bacteria, reducing the risk of illness and disease.
The Different Types of Cleaning

There are many different types of cleaning, each with its own specific purpose. Some common types of cleaning include:
- Household cleaning - This includes cleaning your home or apartment, and can involve tasks such as vacuuming, dusting, and washing dishes.
- Commercial cleaning - This involves cleaning commercial spaces such as offices, stores, and restaurants.
- Industrial cleaning - This involves cleaning industrial spaces such as factories and warehouses.
- Carpet cleaning - This involves cleaning carpets and upholstery using specialized equipment and chemicals.
- Window cleaning - This involves cleaning windows and other glass surfaces using specialized tools and cleaning solutions.
The Cleaning Process

The cleaning process typically involves several steps, including:
- Assessing the space to be cleaned and identifying any areas that require special attention.
- Gathering the necessary equipment and cleaning supplies.
- Removing any loose dirt or debris.
- Applying cleaning solutions and/or water to the surface or space to be cleaned.
- Agitating the surface or space to help loosen dirt and other contaminants.
- Rinsing the surface or space thoroughly to remove all cleaning solutions and/or water.
- Drying the surface or space using towels or other drying equipment.
Cleaning Tips

Here are some tips to help you clean more effectively:
- Use the right cleaning products for the job.
- Read and follow all product labels and instructions.
- Clean from top to bottom, starting with the highest surfaces and working your way down.
- Don't forget to clean hard-to-reach areas such as corners and crevices.
- Change cleaning cloths and towels frequently to avoid spreading dirt and bacteria.
- Always wear protective gloves and eyewear when working with chemicals.
- Dispose of cleaning products and waste properly.
The Benefits of Hiring Professional Cleaners

While it is possible to clean your home or office yourself, there are many benefits to hiring professional cleaners. Professional cleaners have the experience and equipment necessary to clean your space more thoroughly and efficiently, saving you time and effort. Additionally, professional cleaners can help to prolong the life of your surfaces and equipment by using the right cleaning products and techniques.
Conclusion
Cleaning is an important part of maintaining a healthy and safe environment. Whether you are cleaning your home, office, or industrial space, it is essential to use the right cleaning products and techniques to achieve the best results. By following these tips and hiring professional cleaners when necessary, you can keep your space clean and healthy for years to come.
Related video of What Is A Clean?
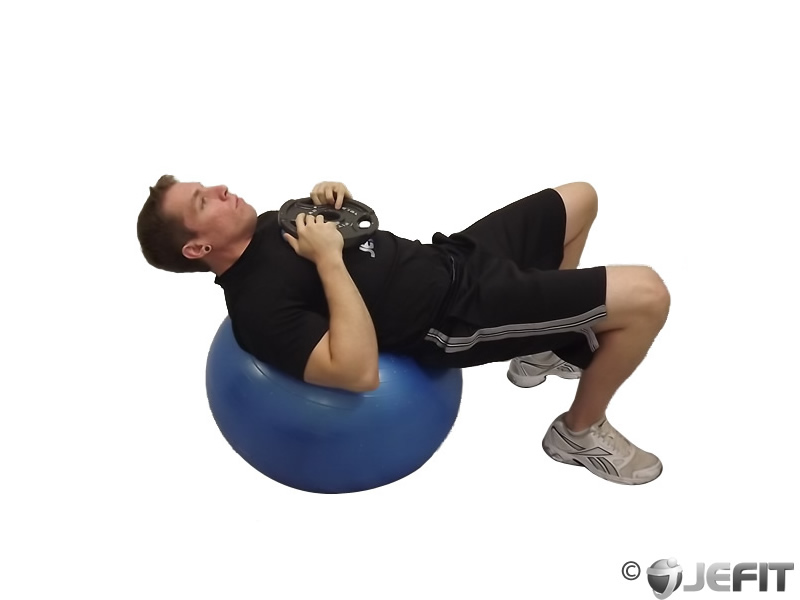
Do you want to tone your abs, back, and core muscles? If so, a sit up with a weight ball is a fantastic exercise to add to your workout routine. Not only does it help to build strength in your abdominal muscles, but it also helps to improve your posture and balance. In this article, we'll take a closer look at the sit up with weight ball and how it can benefit your body.

What is a Sit Up with Weight Ball?
A sit up with a weight ball is a variation of the traditional sit up exercise. Instead of placing your hands behind your head or crossing them over your chest, you hold a weight ball in both hands and lift it up as you sit up. This added weight helps to increase the resistance of the exercise, making it more challenging and effective for strengthening your core muscles.
The Benefits of Sit Up with Weight Ball
There are many benefits to adding the sit up with weight ball to your workout routine. Here are just a few:
- It targets your abdominal muscles, back, and core, helping to build strength and definition in these areas.
- It improves your posture and balance by strengthening the muscles that support your spine.
- It burns calories and helps you to lose weight by engaging the large muscle groups in your core.
- It can be done anywhere, with or without a gym membership, making it a convenient and accessible exercise.
How to Perform a Sit Up with Weight Ball
Here are the steps to perform a sit up with weight ball:
- Lie flat on your back with your knees bent and feet flat on the ground.
- Hold a weight ball in both hands, with your arms extended straight above your chest.
- Engage your core muscles and slowly lift your head, neck, and shoulders off the ground.
- Breathe out as you lift the weight ball up to the ceiling, keeping your arms straight.
- Hold for a second and then slowly lower your body back down to the starting position, breathing in as you do so.
- Repeat for your desired number of reps.
It's important to keep your movements slow and controlled throughout the exercise. Avoid using momentum or swinging your arms to lift the weight ball.
Tips for Success
Here are some tips to help you get the most out of your sit up with weight ball:
- Start with a light weight ball and gradually increase the weight as you get stronger.
- Engage your core muscles throughout the exercise to maximize its effectiveness.
- Perform the exercise on a soft mat or carpet to cushion your spine and prevent injury.
- Don't forget to breathe in and out as you lift and lower your body.
Conclusion
The sit up with weight ball is a fantastic exercise for building strength in your core muscles and improving your overall fitness. It's a simple yet effective way to tone your abs, back, and core, and it can be done anywhere with minimal equipment. So why not give it a try and see the results for yourself?
Related video of Sit Up With Weight Ball: A Great Way to Strengthen Your Core

If you're looking for an effective back exercise that targets your lats, then reverse grip pull downs are definitely worth considering. This exercise is a variation of the traditional pull down and is a great way to add variety to your workout routine.
What are Reverse Grip Pull Downs?
Reverse grip pull downs are a type of exercise that targets your back muscles, particularly your latissimus dorsi (lats). This exercise is performed using a cable machine and a V-bar attachment.
Unlike traditional pull downs, where you use an overhand grip, reverse grip pull downs involve using an underhand grip. This grip not only targets your lats but also engages your biceps and forearms.

How to Perform Reverse Grip Pull Downs
Here's a step-by-step guide on how to perform reverse grip pull downs:
- Attach a V-bar to the cable machine and adjust the weight to your desired level.
- Stand facing the machine and grab the V-bar with an underhand grip, with your hands shoulder-width apart.
- Sit down on the bench and make sure your thighs are secured under the pads.
- Lean slightly back and keep your chest up, looking straight ahead.
- Pull the V-bar down towards your chest, keeping your elbows close to your sides.
- Pause for a second at the bottom of the movement, squeezing your lats.
- Slowly release the bar back up to the starting position.
- Repeat for your desired number of reps.

Benefits of Reverse Grip Pull Downs
Reverse grip pull downs offer several benefits, including:
- Targeting your lats, biceps, and forearms.
- Adding variety to your workout routine.
- Improving your grip strength.
- Helping to prevent injuries by strengthening your back muscles.
- Increasing your overall back strength and size.
Common Mistakes to Avoid
When performing reverse grip pull downs, it's important to avoid these common mistakes:
- Using too much weight and swinging your body to complete the exercise.
- Leaning too far back or forward, which can put unnecessary strain on your back.
- Not squeezing your lats at the bottom of the movement.
- Using your arms instead of your back muscles to pull the bar down.
- Not using a full range of motion, which can limit the effectiveness of the exercise.
Incorporating Reverse Grip Pull Downs into Your Workout Routine
If you want to incorporate reverse grip pull downs into your workout routine, here are some tips:
- Start with a weight that allows you to perform 10-12 reps with good form.
- Gradually increase the weight as you become stronger.
- Perform 3-4 sets of reverse grip pull downs, with a 60-90 second rest between sets.
- Include reverse grip pull downs in your back workout once or twice a week.
- Combine reverse grip pull downs with other back exercises, such as pull ups and rows, to create a well-rounded back workout.
Conclusion
Reverse grip pull downs are an excellent exercise for targeting your lats, biceps, and forearms. By incorporating this exercise into your workout routine, you can improve your overall back strength and size while also preventing injuries. Just be sure to use good form, avoid common mistakes, and gradually increase the weight as you become stronger.
Related video of Reverse Grip Pull Downs: A Comprehensive Guide

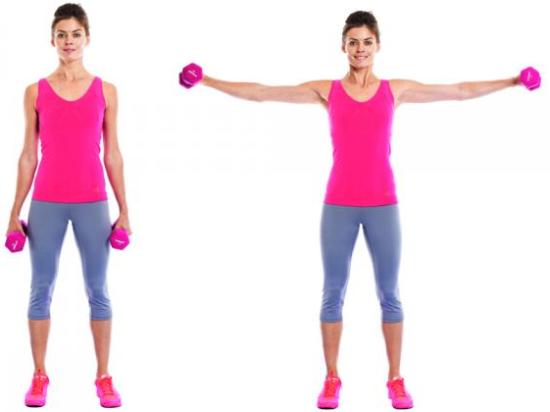
If you're looking to build stronger, more defined shoulders, lateral and frontal raises are two exercises you should definitely add to your workout routine. These exercises target your deltoids, the muscles located on the top of your shoulders, and can help you achieve the sculpted, athletic look you're after.
What Are Lateral Raises?

Lateral raises, also known as lateral deltoid raises, are isolation exercises that primarily target the middle part of your deltoid muscles. To perform a lateral raise, stand with your feet shoulder-width apart, holding a dumbbell in each hand. Keep your arms straight and raise them out to your sides until they're at shoulder height. Slowly lower your arms back down to your sides and repeat.
Lateral raises can be performed using a variety of weights, from light to heavy. If you're new to this exercise, start with a lighter weight and gradually increase as you become more comfortable.
What Are Frontal Raises?

Frontal raises, also known as anterior deltoid raises, are another isolation exercise that targets the front part of your deltoid muscles. To perform a frontal raise, stand with your feet shoulder-width apart, holding a dumbbell in each hand. Keep your arms straight and raise them straight out in front of you until they're at shoulder height. Slowly lower your arms back down to your sides and repeat.
Like lateral raises, frontal raises can be performed using a variety of weights. Start with a lighter weight if you're new to this exercise and increase gradually.
Why Should You Do Lateral And Frontal Raises?

Lateral and frontal raises are great exercises for building stronger, more defined shoulders. By targeting your deltoid muscles, these exercises can help you achieve a more sculpted, athletic look.
In addition to their cosmetic benefits, lateral and frontal raises can also help improve your posture and shoulder stability. Strong shoulders are important for many everyday activities, such as lifting heavy objects and carrying groceries.
How Often Should You Do Lateral And Frontal Raises?

Lateral and frontal raises can be performed several times a week as part of your regular workout routine. However, it's important to avoid overtraining your shoulder muscles, which can lead to injury.
As a general rule, aim to perform lateral and frontal raises no more than two or three times per week, with at least one day of rest in between. This will give your muscles time to recover and grow stronger.
How Many Reps And Sets Should You Do?
The number of reps and sets you should do will depend on your fitness level and goals. If you're new to lateral and frontal raises, start with a lower number of reps and sets and gradually increase as you become more comfortable.
A good starting point is to perform three sets of 10-12 reps for each exercise. As you become stronger, you can increase the weight and the number of reps and sets.
Tips For Performing Lateral And Frontal Raises

Here are some tips to help you perform lateral and frontal raises safely and effectively:
- Keep your arms straight throughout the exercise.
- Focus on using your shoulder muscles to lift the weights, not your arms.
- Avoid swinging your arms or using momentum to lift the weights.
- Breathe slowly and deeply throughout the exercise.
- Use a mirror to check your form and make sure you're performing the exercise correctly.
Conclusion
Lateral and frontal raises are two great exercises for building stronger, more defined shoulders. By targeting your deltoid muscles, these exercises can help you achieve the sculpted, athletic look you're after. Just remember to start with a lower weight if you're new to these exercises, and be sure to use proper form to avoid injury.
