Behind The Back Forearm Curls

When it comes to building strength in your arms, most people focus on biceps and triceps. However, forearm strength is equally important for performing daily tasks and sports activities. One of the most effective exercises for building forearm strength is the behind the back forearm curl. In this article, we will discuss how to perform this exercise, its benefits, and variations.
What Are Behind The Back Forearm Curls?

Behind the back forearm curls are an isolation exercise that target the muscles in your forearms. This exercise involves holding a barbell behind your back with an overhand grip, and curling it up towards your shoulders by flexing your wrists. It primarily works the brachioradialis, which is the largest muscle in your forearm.
How To Perform Behind The Back Forearm Curls?
Follow these steps to perform behind the back forearm curls:
- Stand with your feet shoulder-width apart and your knees slightly bent.
- Hold a barbell with an overhand grip behind your back, with your hands shoulder-width apart.
- Keep your elbows close to your sides and your upper arms stationary throughout the exercise.
- Curl the barbell up towards your shoulders by flexing your wrists.
- Hold the contraction for a second, then slowly lower the barbell back to the starting position.
- Repeat for the desired number of repetitions.

Benefits Of Behind The Back Forearm Curls
Behind the back forearm curls offer several benefits:
- Build forearm strength: This exercise targets the brachioradialis muscle, which helps in gripping and lifting heavy objects.
- Prevent injuries: Strong forearms can help prevent wrist and elbow injuries in daily activities and sports.
- Improve grip strength: Improved grip strength can help in performing exercises like deadlifts, pull-ups, and rows.
- Better aesthetics: Well-developed forearms can improve the overall appearance of your arms.
Variations Of Behind The Back Forearm Curls
Here are some variations of behind the back forearm curls:
- Reverse grip behind the back curls: This variation involves holding the barbell with an underhand grip, which primarily works the brachialis muscle.
- Single arm behind the back curls: This variation involves using one arm at a time, which helps in isolating each forearm muscle.
- Barbell wrist curls: This exercise involves holding the barbell with an underhand grip and curling it up by flexing your wrists, which primarily works the wrist flexor muscles.
Tips For Performing Behind The Back Forearm Curls
Here are some tips for performing behind the back forearm curls:
- Start with a lighter weight and gradually increase it as you get comfortable with the exercise.
- Keep your elbows close to your sides throughout the exercise to avoid shoulder strain.
- Engage your core muscles to maintain proper posture and balance.
- Avoid jerking the weight up or using momentum to lift it.
- Perform the exercise in a slow and controlled manner for maximum benefits.
Conclusion
Behind the back forearm curls are an effective exercise for building forearm strength and improving grip. It primarily targets the brachioradialis muscle and offers several benefits like injury prevention and better aesthetics. You can also try variations like reverse grip behind the back curls and single arm behind the back curls to target different forearm muscles. Follow the tips mentioned above to perform this exercise safely and effectively.
Related video of Behind The Back Forearm Curls: Build Your Forearm Strength
Neutral Grip Seated Cable Row

The neutral grip seated cable row is a popular exercise that targets the back, particularly the lats and traps, while also engaging the biceps and forearms. It is a variation of the traditional seated cable row, but with a neutral grip, which means the palms face each other instead of facing down or up. This grip position reduces the stress on the wrists and elbows, making it a safer and more comfortable choice for people with joint issues.
How to Perform Neutral Grip Seated Cable Row

To perform the neutral grip seated cable row, follow these steps:
- Adjust the height of the cable machine so that the handles are at chest level.
- Sit on the bench with your feet firmly planted on the ground and your knees slightly bent.
- Grasp the handles with a neutral grip, keeping your elbows close to your sides and your shoulders relaxed.
- Keep your back straight and your core engaged as you pull the handles towards your chest, squeezing your shoulder blades together.
- Pause briefly at the top of the movement, then slowly release the handles back to the starting position.
- Repeat for the desired number of reps.
Common Mistakes to Avoid

Here are some common mistakes to avoid when performing neutral grip seated cable rows:
- Using too much weight, which can compromise your form and increase the risk of injury.
- Slouching or arching your back, which can strain your lower back and reduce the effectiveness of the exercise.
- Letting your elbows flare out, which can shift the focus away from your back and onto your shoulders.
- Rushing through the movement, which can limit your range of motion and reduce the time your muscles spend under tension.
- Not fully extending your arms at the bottom of the movement, which can reduce the stretch on your lats and limit their activation.
Variations and Progressions

If you want to make the neutral grip seated cable row more challenging or target different parts of your back, you can try these variations and progressions:
- Using a wider or narrower grip
- Adding a pause or squeeze at the top of the movement
- Incorporating a drop set or superset
- Increasing the weight or reps
- Performing the exercise on a stability ball or Bosu ball
Benefits of Neutral Grip Seated Cable Row

The neutral grip seated cable row offers several benefits, including:
- Building a strong and defined back
- Improving posture and spinal stability
- Strengthening the biceps and forearms
- Reducing the risk of wrist and elbow injuries
- Improving grip strength and endurance
Conclusion
The neutral grip seated cable row is a versatile and effective exercise that can help you build a stronger, more balanced, and more functional back. By using proper form, avoiding common mistakes, and progressively challenging yourself, you can reap the many benefits of this exercise and take your fitness to the next level.
Related video of Neutral Grip Seated Cable Row: A Comprehensive Guide
Bosu Ball Leg Exercises

Bosu ball is a versatile tool that can be used for a variety of workouts, including leg exercises. It is a great way to improve balance, stability, and coordination while engaging different muscle groups. In this article, we will discuss some of the best Bosu ball leg exercises that you can try to strengthen your lower body.
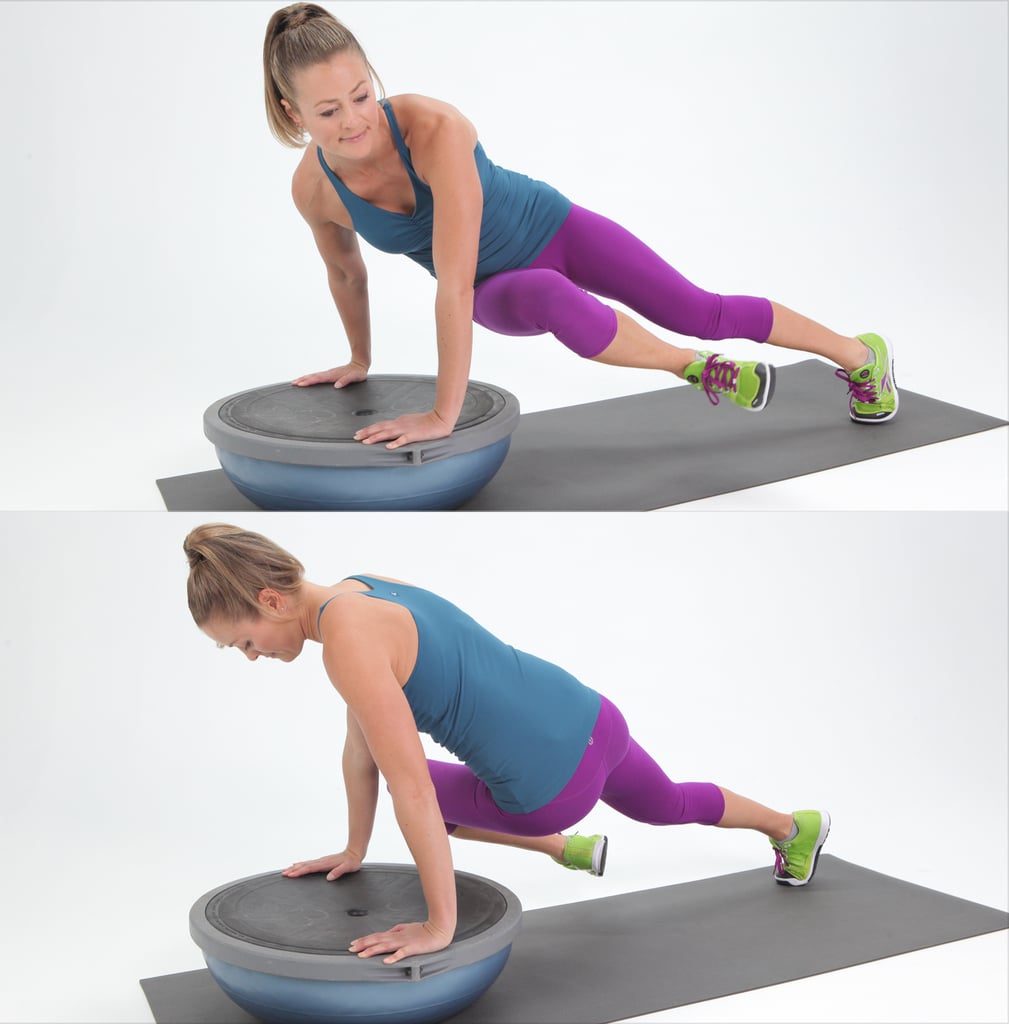
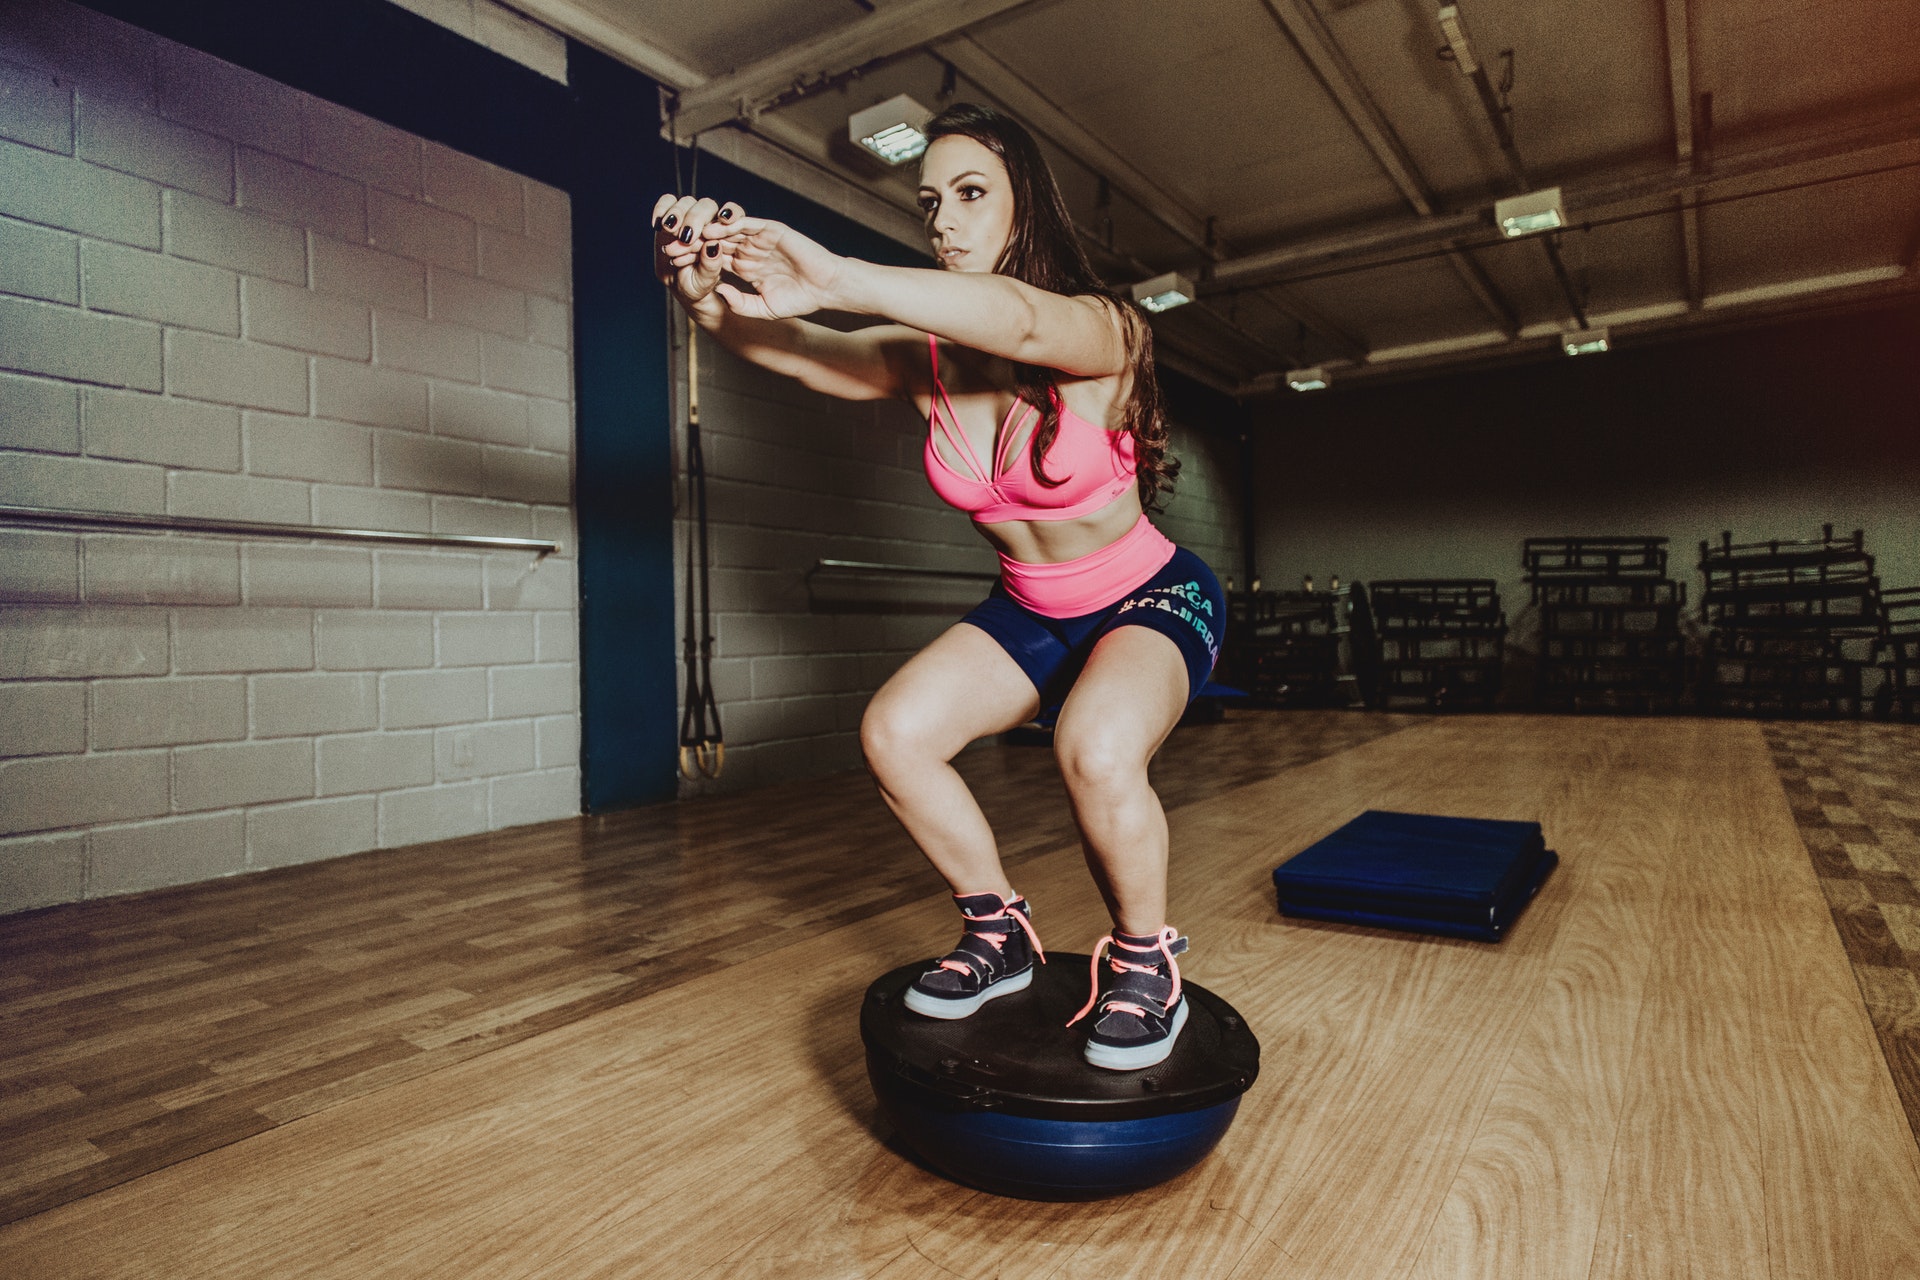
Bosu Ball Squats

Bosu ball squats are a great exercise to work on your lower body strength and balance. Start by standing on the Bosu ball with your feet shoulder-width apart, and your toes pointing forward. Slowly lower your body by bending your knees and pushing your hips back, as if you are sitting on a chair. Keep your back straight and your core engaged. Pause for a second, then slowly raise your body back up to the starting position.
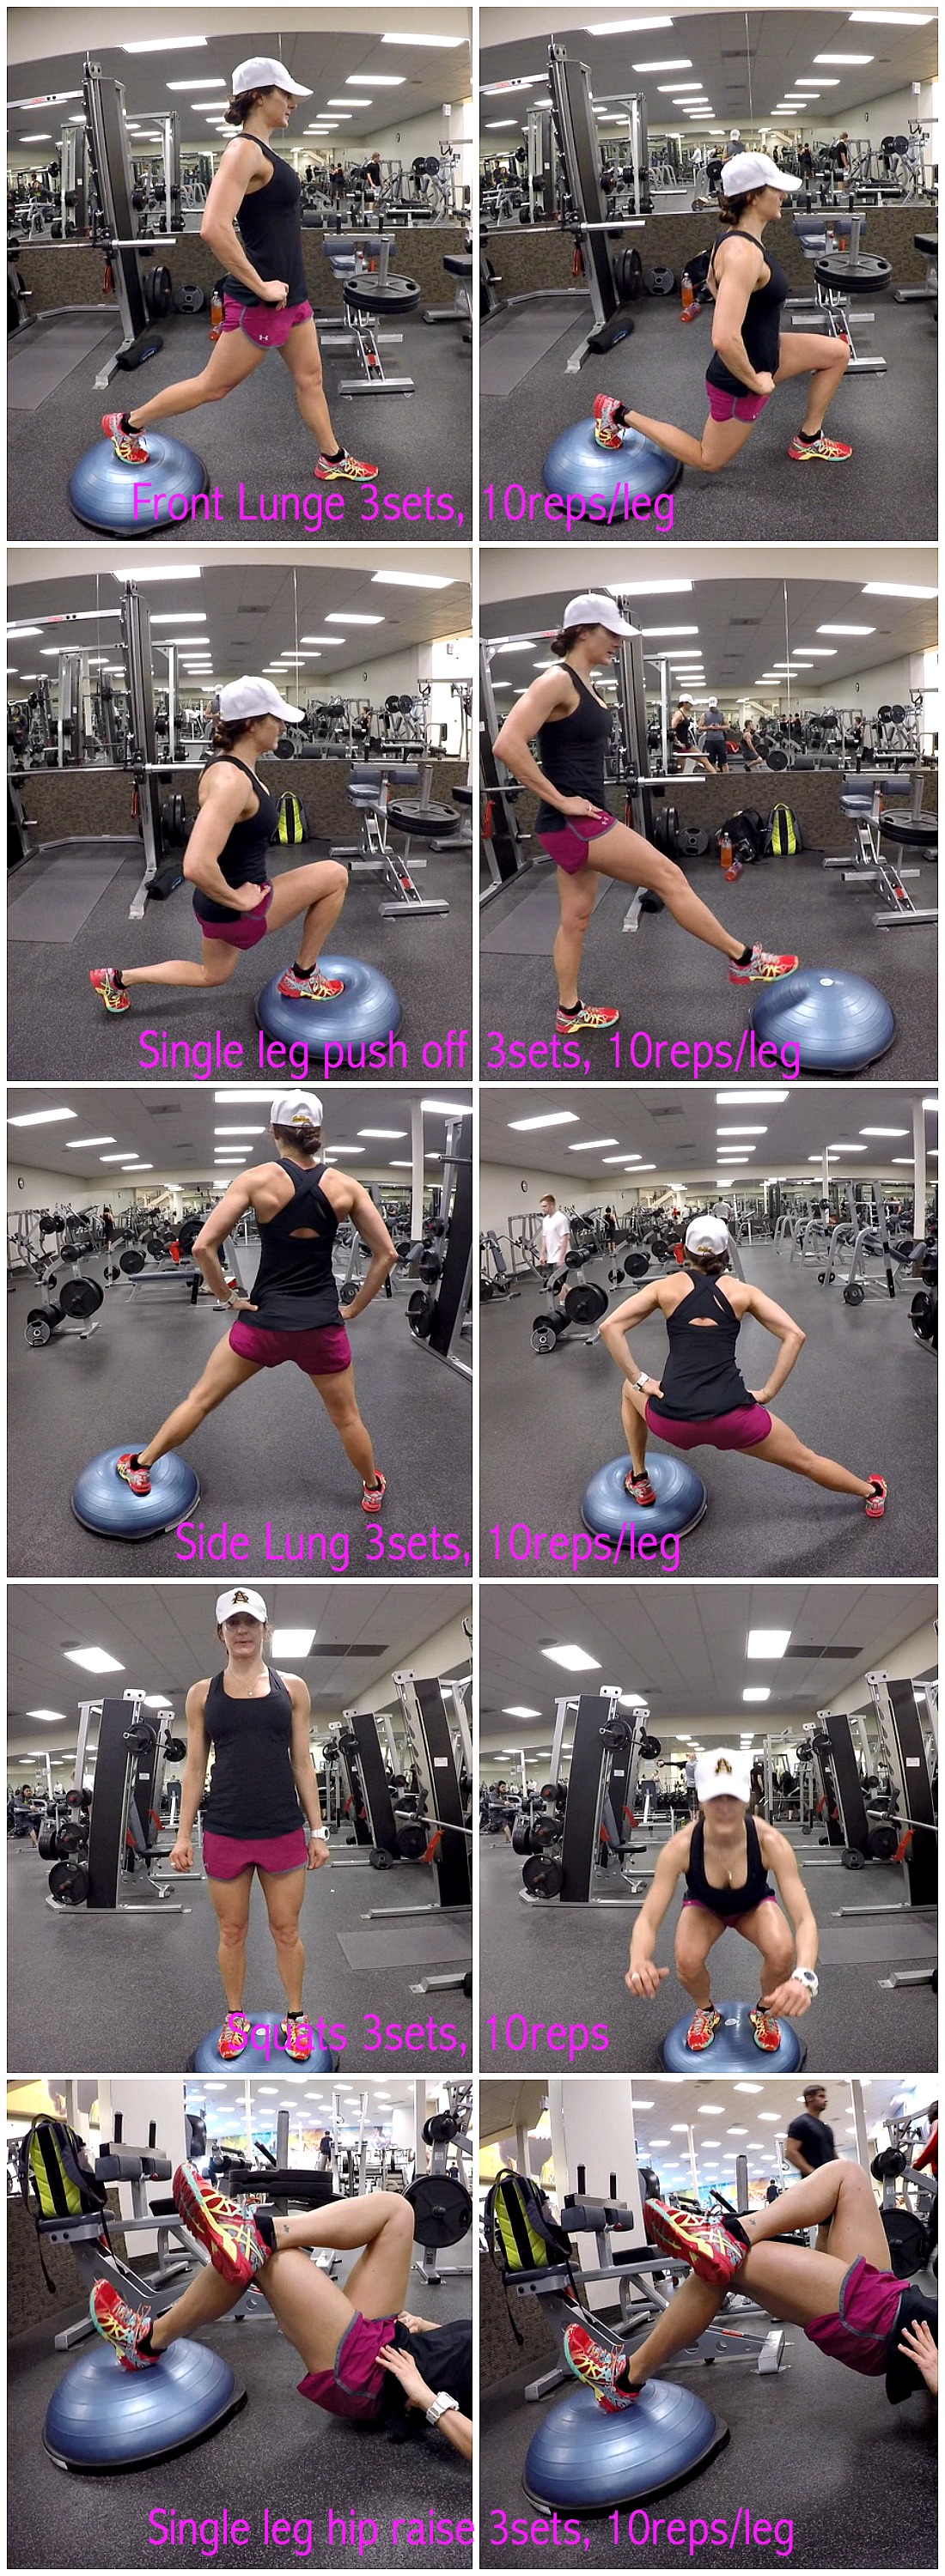
Bosu Ball Lunges

Bosu ball lunges are another great exercise to target your glutes, quads, and hamstrings. Start by standing on the Bosu ball with one foot and keeping the other foot on the ground behind you. Lower your body by bending your front knee and pushing your hips back, keeping your back straight and your core engaged. Pause for a second, then slowly raise your body back up to the starting position. Repeat on the other leg.
Bosu Ball Calf Raises
Bosu ball calf raises are a simple yet effective exercise to strengthen your calf muscles. Stand on the Bosu ball with your feet together and your toes pointing forward. Slowly raise your heels off the ground, keeping your knees straight. Pause for a second, then slowly lower your heels back down to the starting position.
Bosu Ball Deadlifts

Bosu ball deadlifts are a challenging exercise that targets your glutes, hamstrings, and lower back. Start by standing on the Bosu ball with your feet shoulder-width apart, and your toes pointing forward. Hold a dumbbell in each hand, with your arms hanging down in front of you. Slowly lower your upper body by bending at the hips and keeping your back straight, until the dumbbells reach your shins. Pause for a second, then slowly raise your body back up to the starting position.
Bosu Ball Step-Ups

Bosu ball step-ups are a great exercise to target your quads, hamstrings, and glutes. Start by standing in front of the Bosu ball with one foot on top of it and the other foot on the ground. Push through your front foot to raise your body up onto the Bosu ball. Pause for a second, then slowly lower your body back down to the starting position. Repeat on the other leg.
Bosu Ball Side Lunges
Bosu ball side lunges are a great exercise to target your inner and outer thigh muscles. Start by standing on the Bosu ball with your feet together. Take a big step to the side with one foot, keeping the other foot on the Bosu ball. Lower your body by bending your knee and pushing your hips back, keeping your back straight and your core engaged. Pause for a second, then slowly raise your body back up to the starting position. Repeat on the other leg.
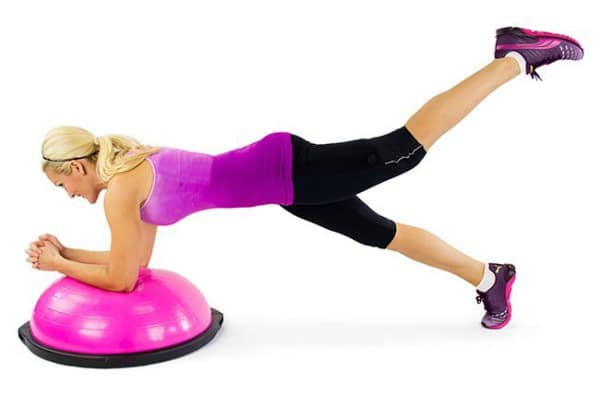
Bosu Ball Glute Bridges
Bosu ball glute bridges are a great exercise to target your glutes and hamstrings. Start by lying on your back on the Bosu ball with your feet flat on the ground and your knees bent. Push through your heels to raise your hips up towards the ceiling, keeping your back straight and your core engaged. Pause for a second, then slowly lower your hips back down to the starting position.
Bosu Ball Leg Presses

Bosu ball leg presses are a great exercise to target your quads, hamstrings, and glutes. Lie on your back on the Bosu ball with your feet flat on the ground and your knees bent. Place a dumbbell on your hips. Push through your heels to raise the dumbbell up towards the ceiling, keeping your back straight and your core engaged. Pause for a second, then slowly lower the dumbbell back down to the starting position.
Bosu Ball Skater Jumps

Bosu ball skater jumps are a great exercise to target your quads, hamstrings, and glutes while improving your balance and coordination. Start by standing on one side of the Bosu ball with one foot, and keeping the other foot off the ground. Push off with your front foot to jump over the Bosu ball to the other side, landing on the other foot. Repeat for several reps, then switch sides.
Bosu Ball Single-Leg Deadlifts
Bosu ball single-leg deadlifts are a challenging exercise that targets your hamstrings, glutes, and lower back. Start by standing on one foot on the Bosu ball, with the other foot off the ground. Hold a dumbbell in one hand, with your arm hanging down in front of you. Slowly lower your upper body by bending at the hips and keeping your back straight, until the dumbbell reaches your shin. Pause for a second, then slowly raise your body back up to the starting position.
Bosu Ball Squat Jumps

Bosu ball squat jumps are a great exercise to improve your explosive power and cardiovascular endurance while targeting your leg muscles. Start by standing on the Bosu ball with your feet shoulder-width apart, and your toes pointing forward. Lower your body by bending your knees and pushing your hips back, as if you are sitting on a chair. Explosively jump up as high as you can, then land back on the Bosu ball in the starting position.
Bosu Ball Lateral Jumps

Bosu ball lateral jumps are a great exercise to improve your lateral quickness and agility while targeting your leg muscles. Start by standing on one side of the Bosu ball with one foot, and keeping the other foot off the ground. Jump laterally over the Bosu ball to the other side, landing on the other foot. Repeat for several reps, then switch sides.
Bosu Ball Bulgarian Split Squats

Bosu ball Bulgarian split squats are a great exercise to target your quads, hamstrings, and glutes while improving your balance and stability. Start by standing in front of the Bosu ball with one foot on top of it and the other foot on the ground behind you. Lower your body by bending your front knee and pushing your hips back, keeping your back straight and your core engaged. Pause for a second, then slowly raise your body back up to the starting position. Repeat on the other leg.
Bosu Ball Leg Curl

Bosu ball leg curl is a great exercise to target your hamstrings. Start by lying on your back on the ground with your feet on top of the Bosu ball. Lift your hips off the ground, and slowly curl the ball towards your body by bending your knees. Pause for a second, then slowly extend your legs back to the starting position.
Related video of Bosu Ball Leg Exercises
One Armed Shoulder Press
One armed shoulder press is an excellent exercise for building shoulder muscles, improving shoulder stability, and enhancing upper body strength. It is a variation of the traditional shoulder press, which involves using a single dumbbell or kettlebell instead of two. This exercise targets your deltoids, triceps, and upper back muscles, making it an effective workout for building a well-rounded upper body. In this article, we will discuss how to perform the one armed shoulder press correctly, its benefits, and some tips to keep in mind while doing it.
How to do One Armed Shoulder Press

Before starting, make sure to warm up your shoulders by doing some light cardio and stretching exercises. Once you are ready, follow these steps to do a one armed shoulder press:
- Stand with your feet shoulder-width apart and hold a dumbbell or kettlebell in one hand at shoulder height, with your elbow bent and your palm facing forward.
- Press the weight upward until your arm is fully extended overhead, keeping your core engaged and your back straight.
- Pause for a second and then slowly lower the weight back to the starting position.
- Repeat the same movement for the desired number of reps and then switch sides.
Do 3-4 sets of 8-12 reps on each side, depending on your fitness level and the weight you are using. Make sure to rest for 30-60 seconds between sets to allow your muscles to recover.
Benefits of One Armed Shoulder Press

One armed shoulder press offers several benefits, including:
- Building shoulder muscles: One armed shoulder press targets your deltoids, which are the muscles responsible for lifting your arms overhead. By doing this exercise, you can strengthen and grow your shoulder muscles.
- Improving shoulder stability: One armed shoulder press requires you to stabilize your body while lifting the weight overhead. This can help improve your shoulder stability and reduce your risk of injury.
- Enhancing upper body strength: One armed shoulder press works not only your shoulders but also your triceps and upper back muscles. By doing this exercise regularly, you can increase your overall upper body strength.
Tips for Doing One Armed Shoulder Press

Here are some tips to keep in mind while doing one armed shoulder press:
- Choose the right weight: Start with a lighter weight and gradually increase it as you get stronger. The weight should be challenging but not too heavy that you compromise your form.
- Maintain proper form: Keep your core engaged, your back straight, and your elbow close to your body while pressing the weight overhead. Avoid arching your back or leaning to one side.
- Breathe properly: Inhale before starting the press and exhale as you lift the weight overhead. Inhale again as you lower the weight back to the starting position.
- Alternate sides: To ensure you work both sides of your body equally, alternate sides after each set.
Conclusion
One armed shoulder press is a great exercise for building shoulder muscles, improving shoulder stability, and enhancing upper body strength. By following the correct form and incorporating it into your workout routine, you can reap its benefits and achieve your fitness goals. Remember to start with a lighter weight, maintain proper form, and breathe properly while doing this exercise.
Related video of One Armed Shoulder Press: A Complete Guide on How to Do It
Do Push Ups Build Shoulders

Push ups are one of the most popular exercises around, and for good reason. They work multiple muscles in your body including your chest, triceps, and shoulders. But do push ups build shoulders?
The Anatomy of the Shoulders

The shoulders are made up of three main muscles: the anterior deltoid, medial deltoid, and posterior deltoid. The anterior deltoid is responsible for lifting your arms to the front, the medial deltoid lifts your arms to the side, and the posterior deltoid lifts your arms to the back.
How Push Ups Work the Shoulders

Push ups primarily work the chest and triceps, but they also engage the shoulders. When you perform a push up, you're using your shoulders to stabilize your body and support your weight. This means that your shoulders are working isometrically, which means they're contracting but not moving.
The Benefits of Push Ups for Shoulders

While push ups aren't a direct shoulder exercise, they can help to strengthen and tone your shoulders. By engaging the shoulders during the exercise, push ups can help to improve your shoulder stability and prevent injuries. Additionally, push ups can help to improve your overall upper body strength, which can make it easier to perform other shoulder exercises.
Should You Do Push Ups for Shoulders?

If you're looking to specifically build your shoulder muscles, push ups may not be the best exercise for you. However, if you're looking for an overall upper body workout that will engage your shoulders, push ups are a great option. Additionally, if you're just starting out with strength training, push ups are a good exercise to include in your routine as they're easy to perform and require no equipment.
Variations of Push Ups for Shoulders

If you're looking to target your shoulders more during push ups, there are a few variations you can try. The first is the pike push up, which is a push up where you're in a pike position with your hips in the air and your hands close together. This variation places more emphasis on the shoulders than a traditional push up.

Another variation is the diamond push up, which is a push up where your hands are close together in a diamond shape. This variation also places more emphasis on the shoulders than a traditional push up.
Conclusion
While push ups may not be the best exercise for specifically building your shoulder muscles, they can help to strengthen and tone your shoulders. Additionally, push ups are a great overall upper body exercise that can help to improve your shoulder stability and prevent injuries. If you're looking to target your shoulders more during push ups, try variations like the pike push up or diamond push up.
Related video of Do Push Ups Build Shoulders?
Behind The Back Forearm Curls
When it comes to building strength in your arms, most people focus on biceps and triceps. However, forearm strength is equally important for...
